G.O.A.T – Rad Patterns
Clara – Jalie
Anything but Basic – DIBY
Eden – Bella Sunshine
Peg Legs – Patterns for Pirates
20K – Max & Meena
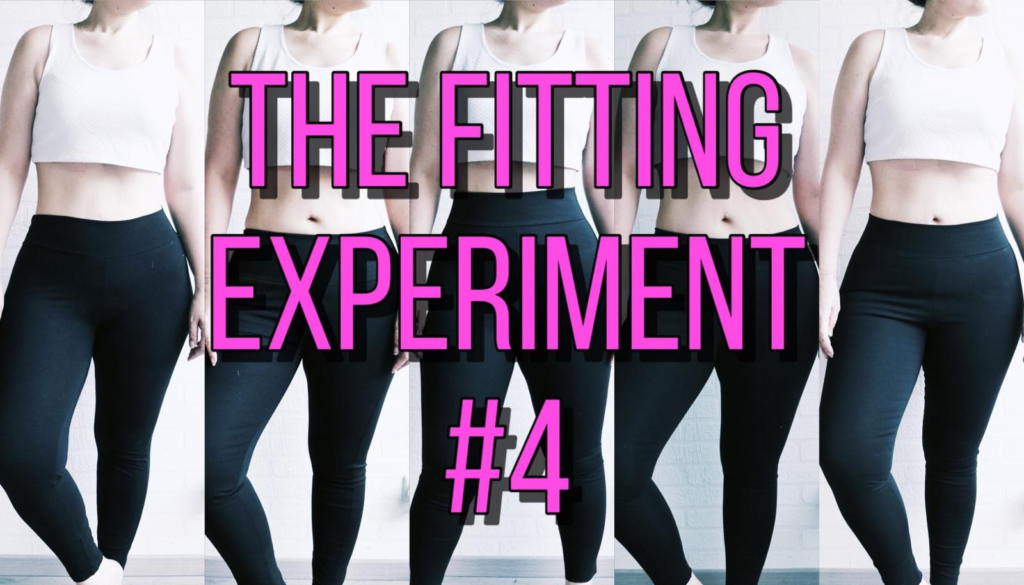
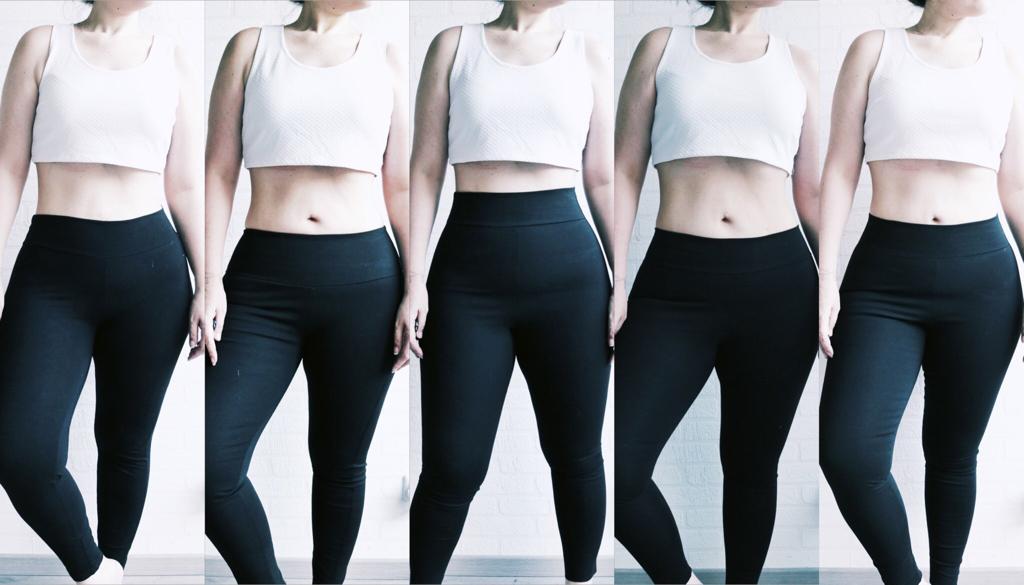
We are back with the 4th edition of the Fitting Experiment and I couldn’t be happier about it. This time we’re featuring a very much loved wardrobe staple: LEGGINGS!
The idea of this experiment was to have each participant sew 2 leggings using the same patterns, 1 paid and 1 free. After that, each sewist was free to add to their own list if they chose to.
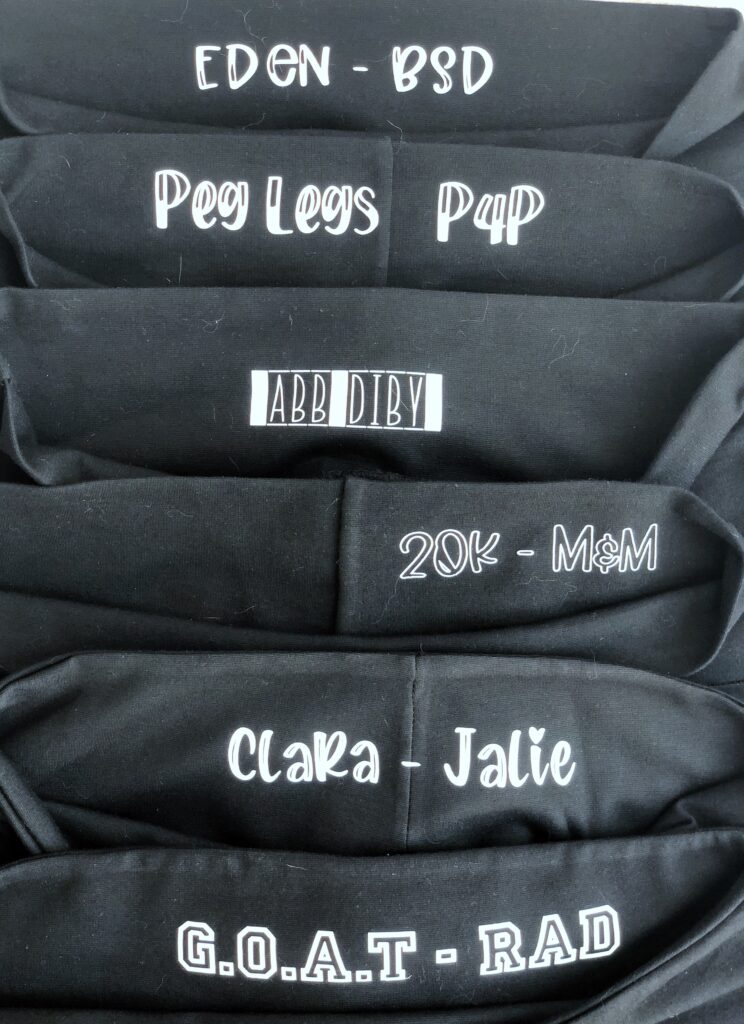
The patterns chosen for the experiment were:
- G.O.A.T from Rad patterns
- 20k from Max & Meena
The reason behind the choice is that we all wanted to try the G.O.A.t now that Rad is branching out to sportswear patterns and we were curious about the M&M one as we don’t see it around too often.
Stephanie, was amazing and agreed to sponsor us with the G.O.A.T patterns AND offering a fantastic discount code for our readers. Stay tuned, more info at the end of the post 😉
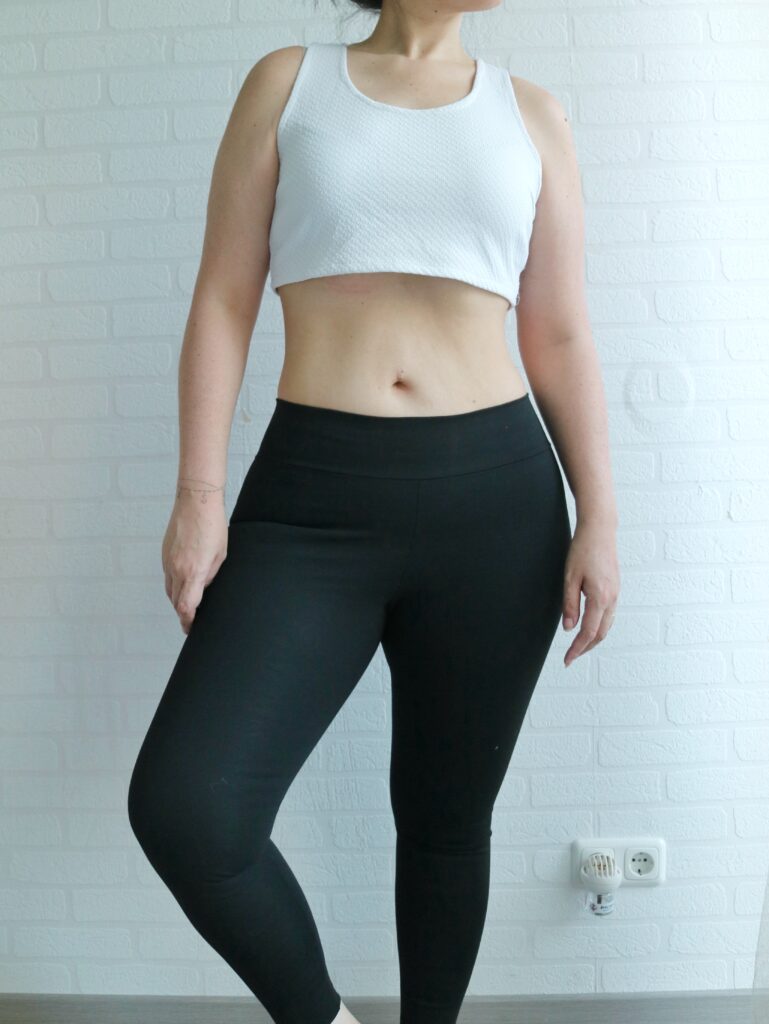
I was too enthousiastic and went a little overboard with the leggings making 😀
Here are the ones I’ll be talking about today:
MY “RULES”
For this experiment I decided on the following:
- Make the simplest option for each pattern, no pockets or fancy bells and whistles to keep the focus on fit;
- When given a choice, make the highest waistband/rise offered. This is purely selfish because I love a high-waisted bottom;
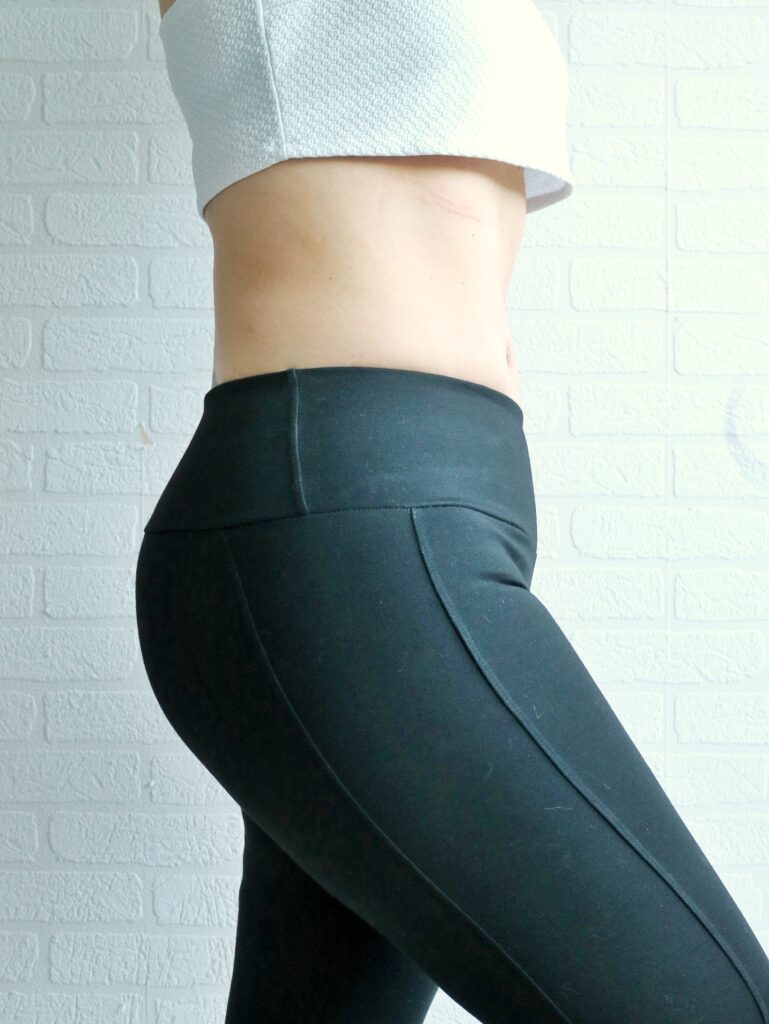
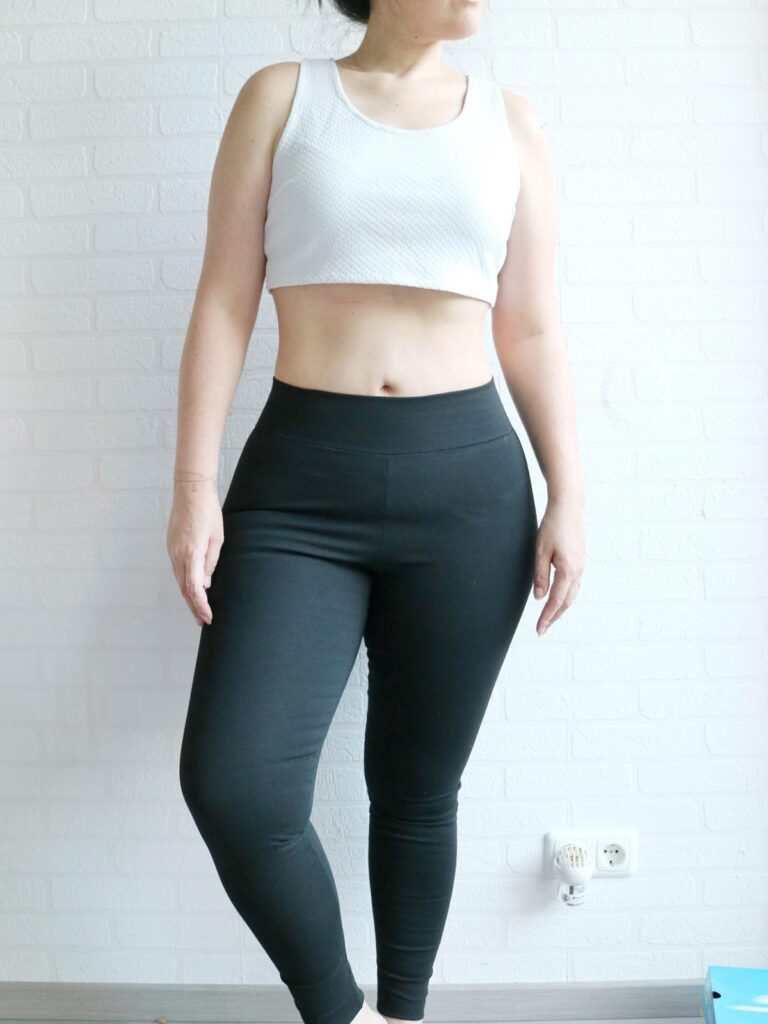
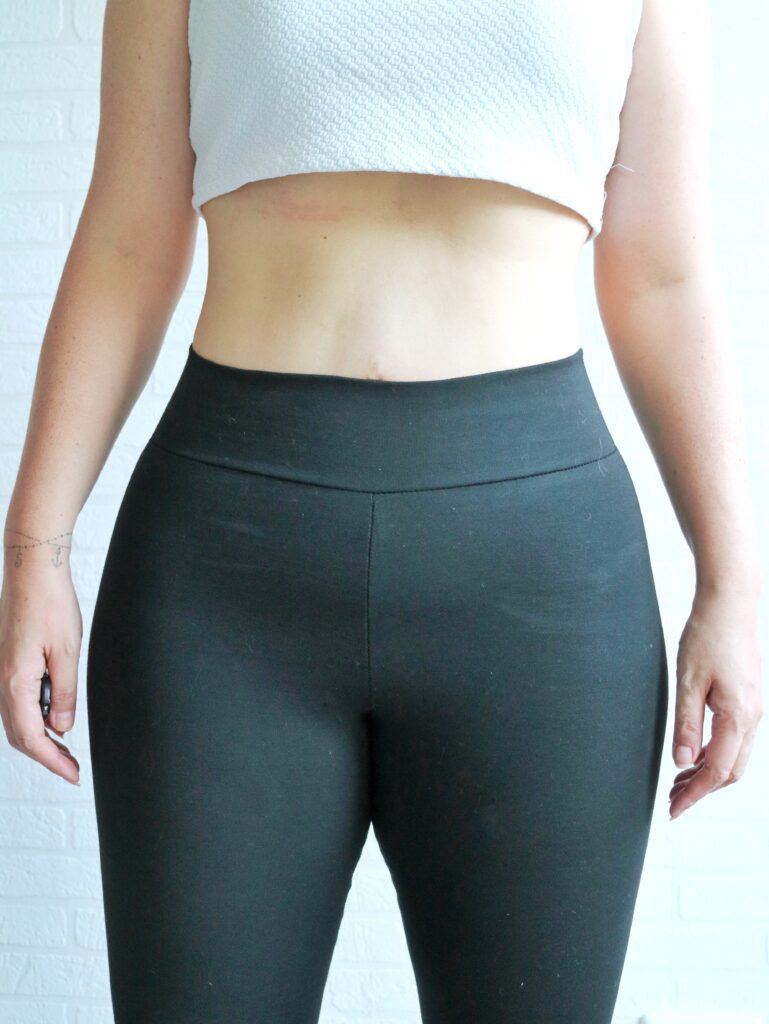
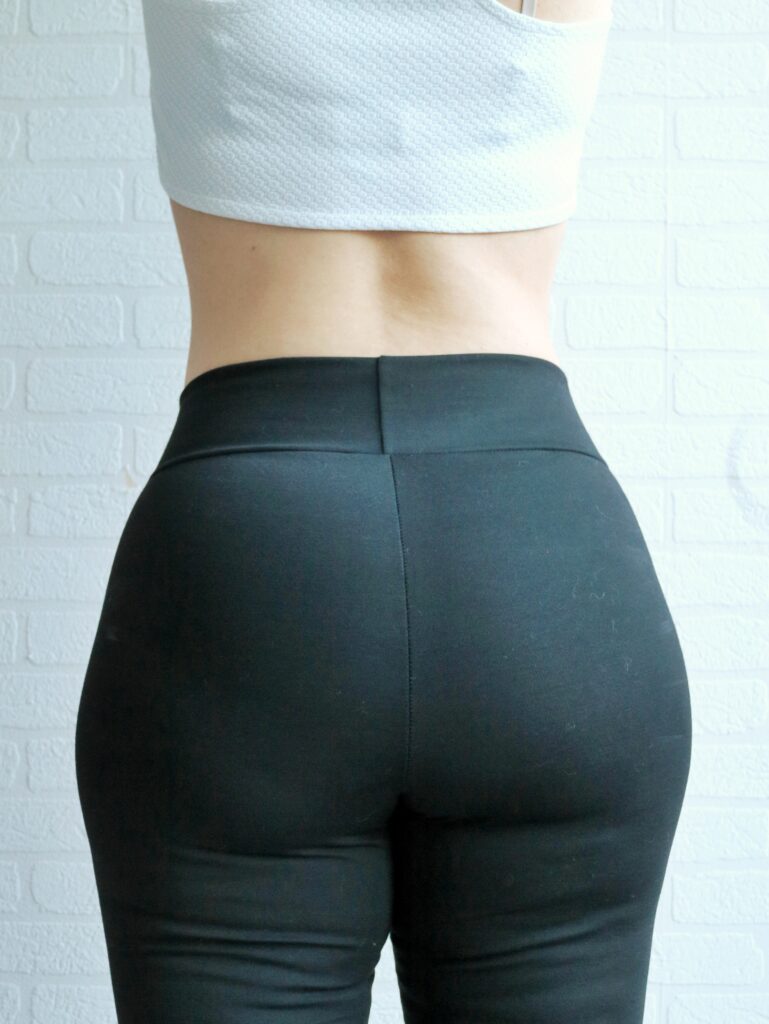
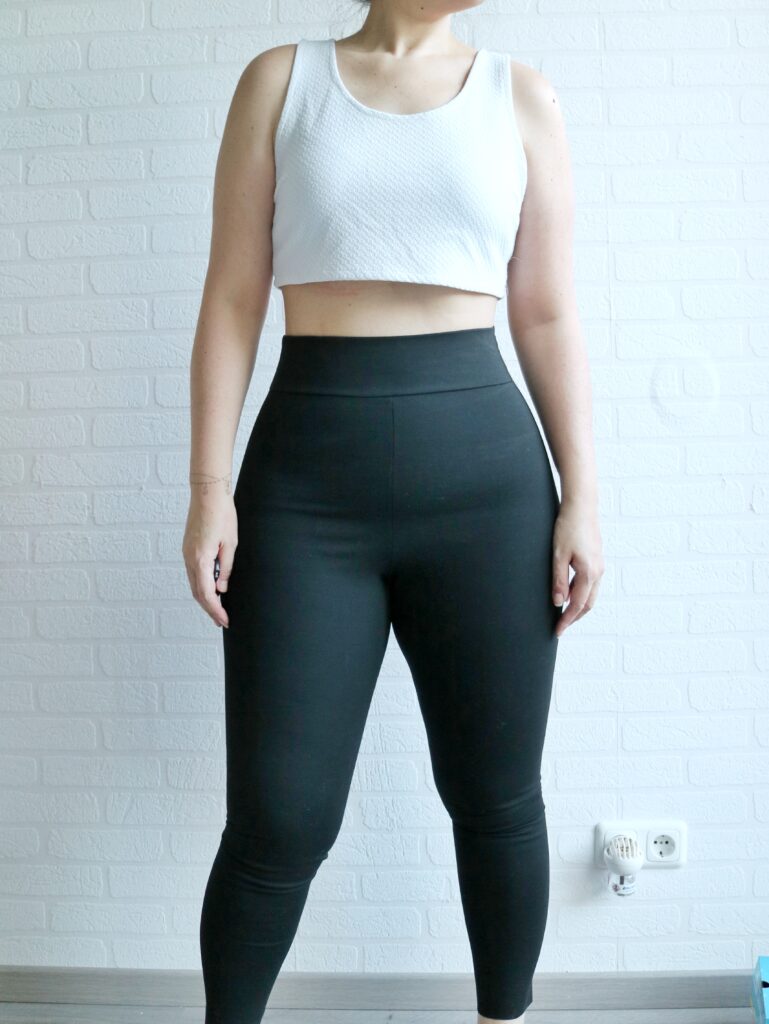
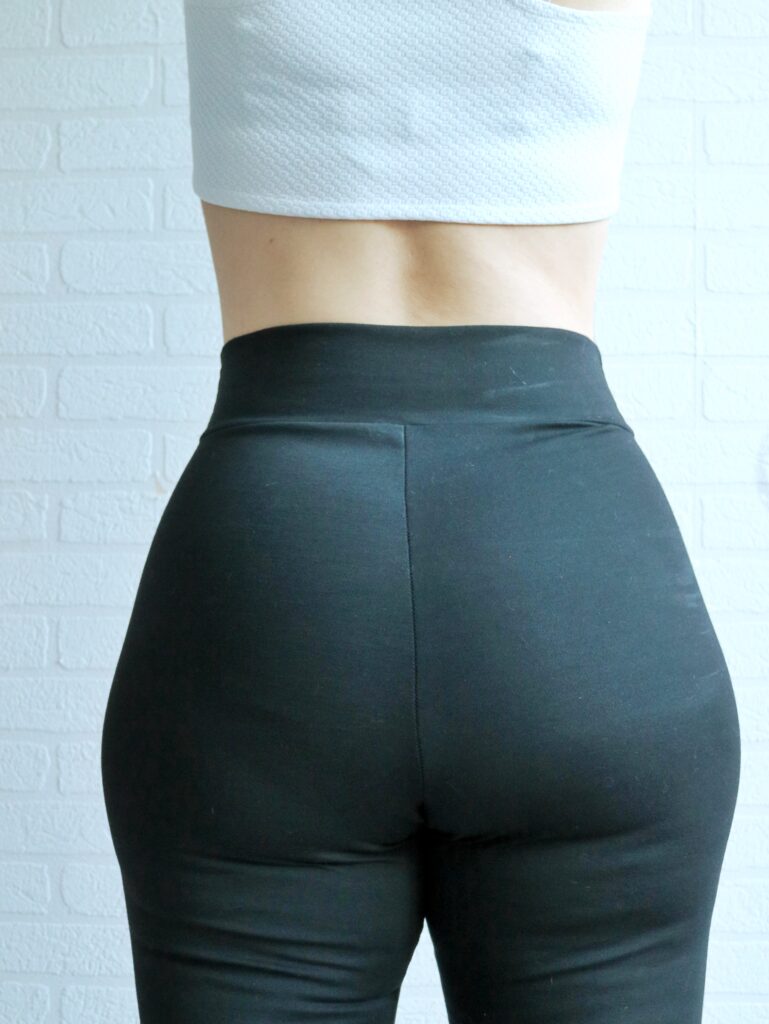
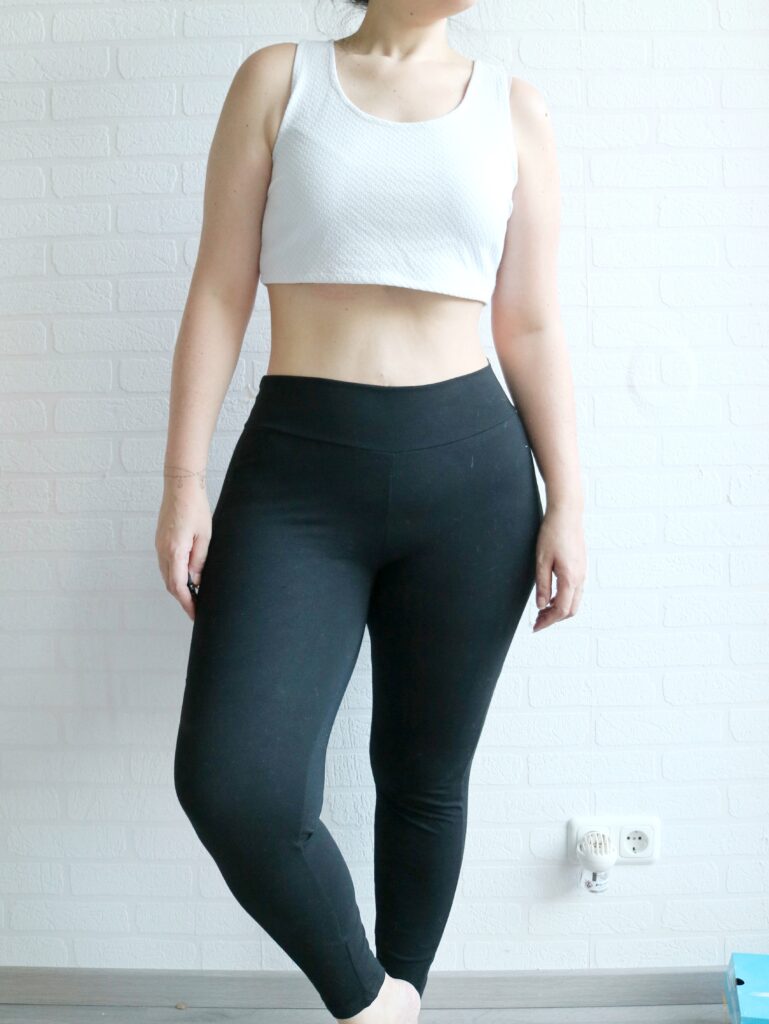
- Use the same fabric throughout. I chose black 4way Ponte because black leggings are my go-to and I don’t enjoy thinner fabrics for pants. The jiggle must be somewhat contained.
- I focused the attention on WAIST-HIPS-CROTCH areas as that’s when I have most of my issues. With leggings, I usually have no issues on the knee, calf, and ankle areas.
- I won’t be going through each pattern detail as per usual because this post will be long enough as it is. 😉 If there’s a popular demand, I’ll add it later on haha
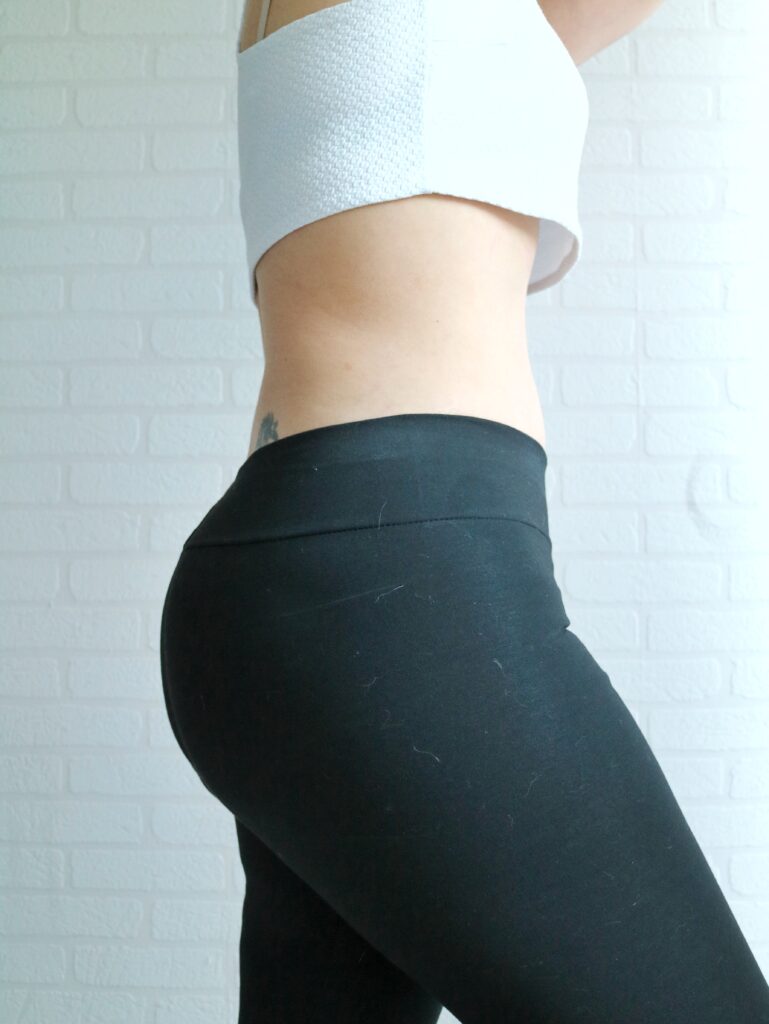
Black is super difficult to photograph while showing details, I had edit the photos a lot so I apologize for the grainy quality of the photos. Also, my cat thought that the pile of black leggings was THE perfect place to nap, so there’s that… lol
My measurements at the time of the experiment were:
- Waist 30″
- Hips 47″
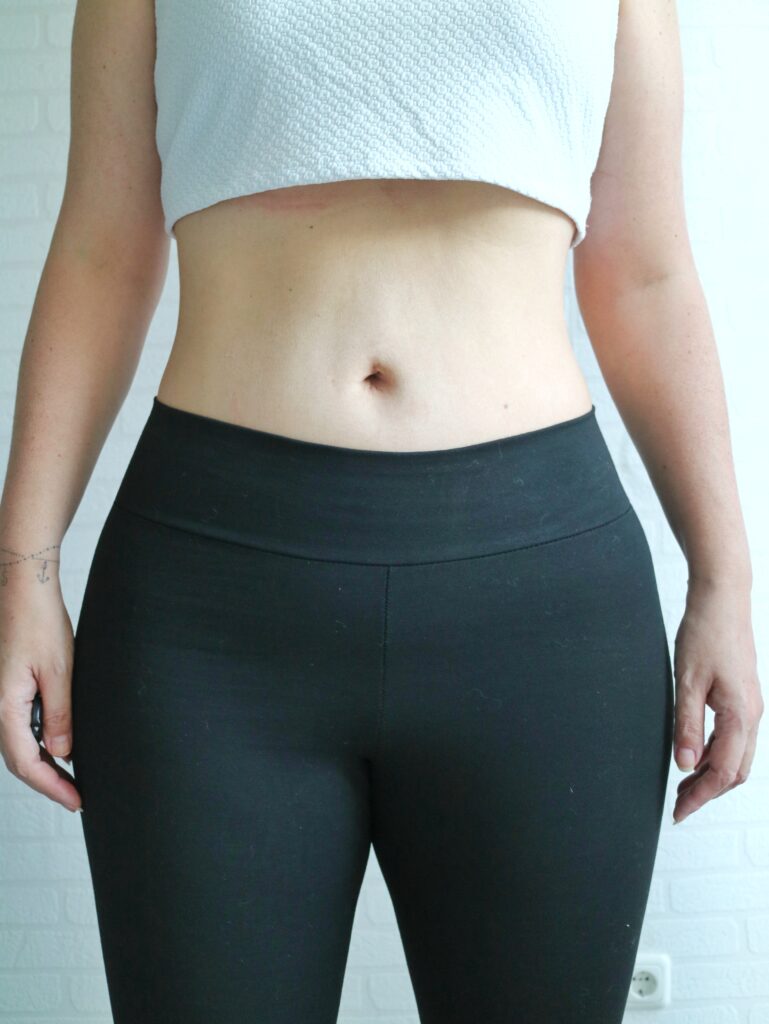
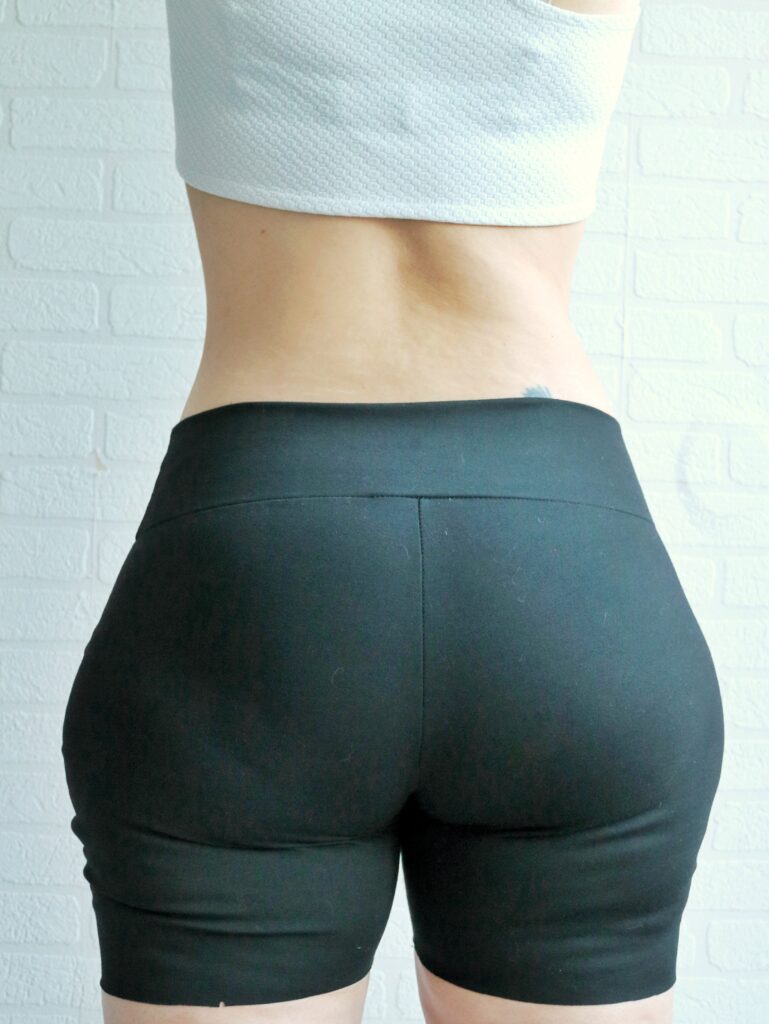
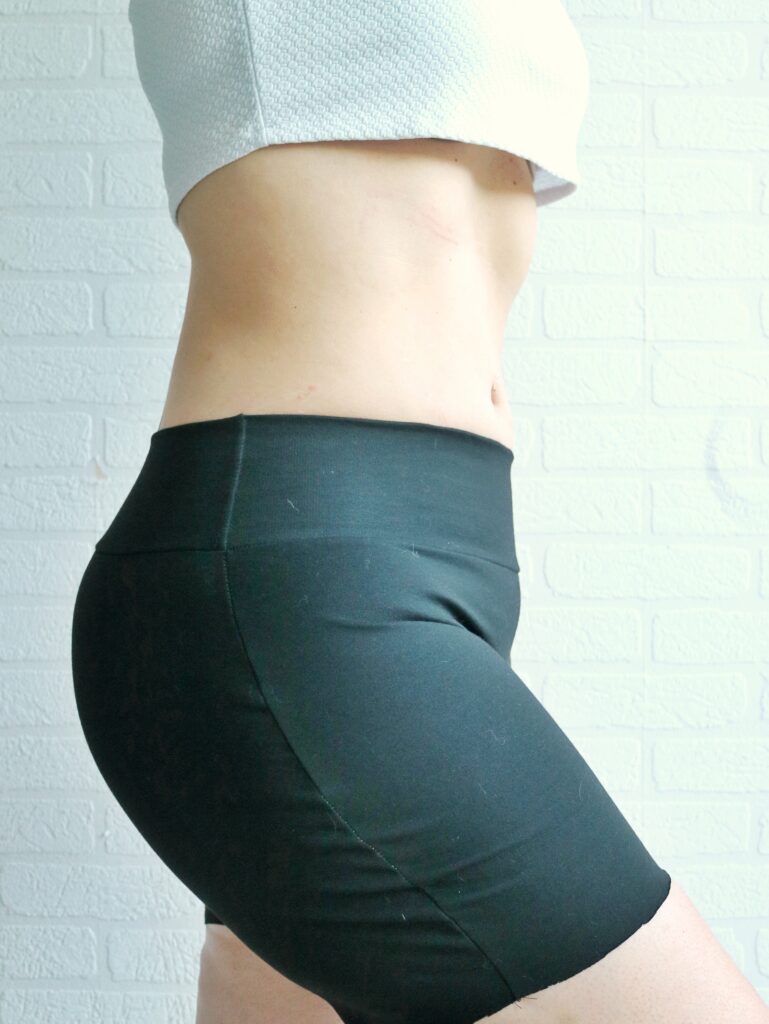
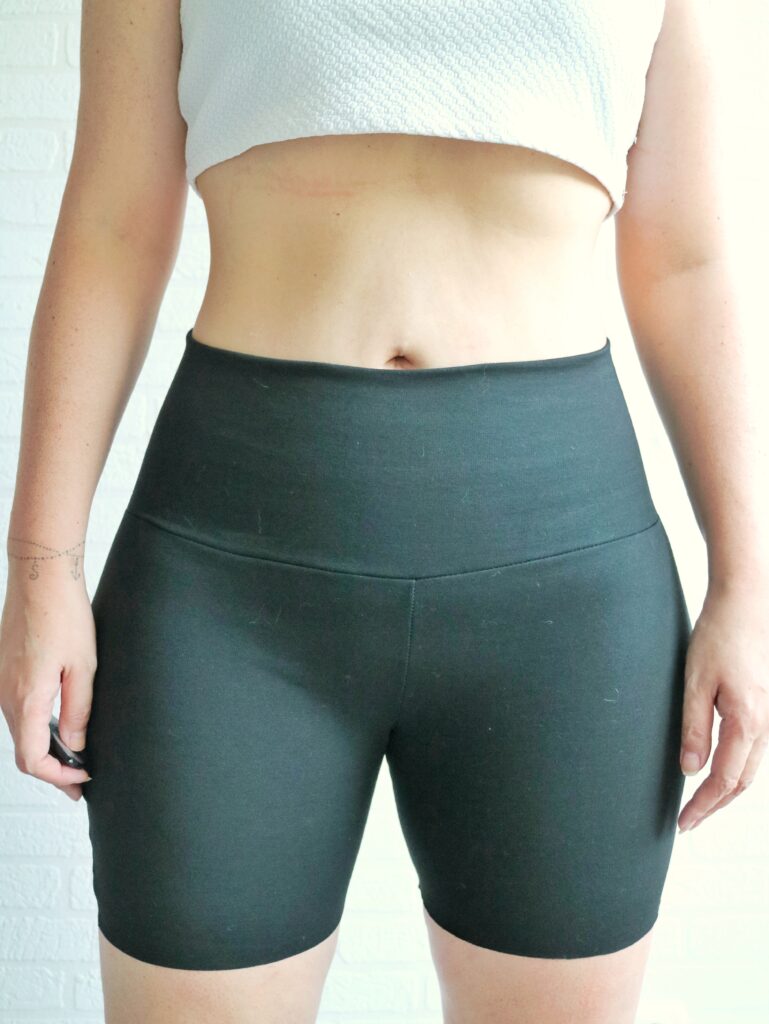
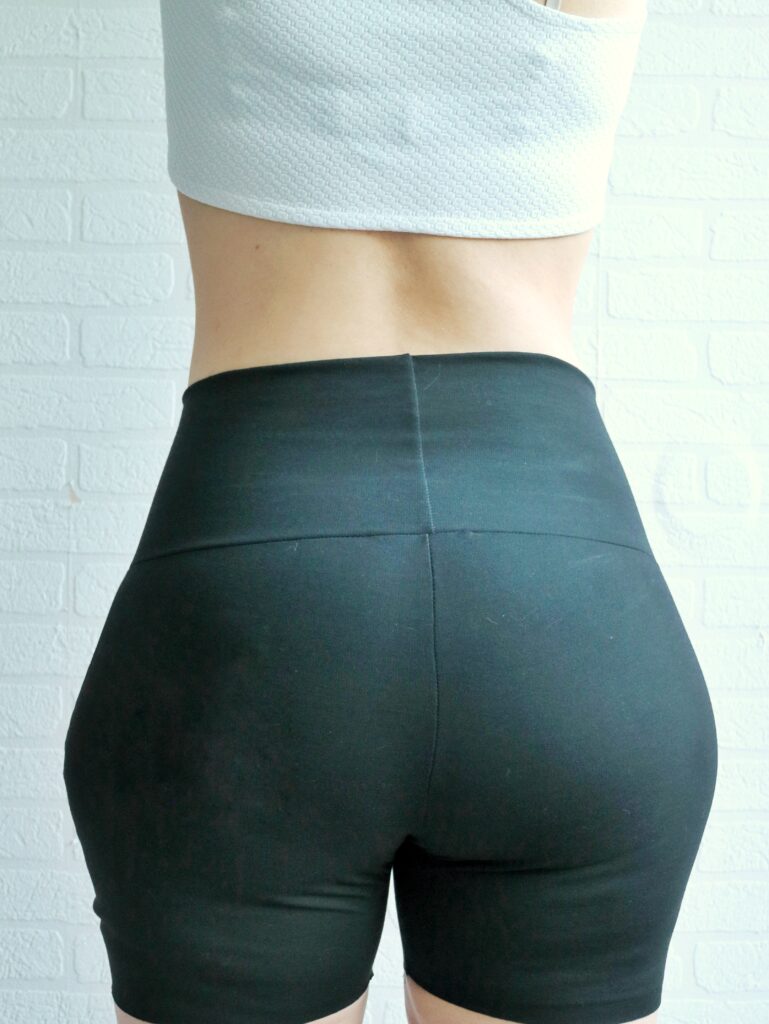
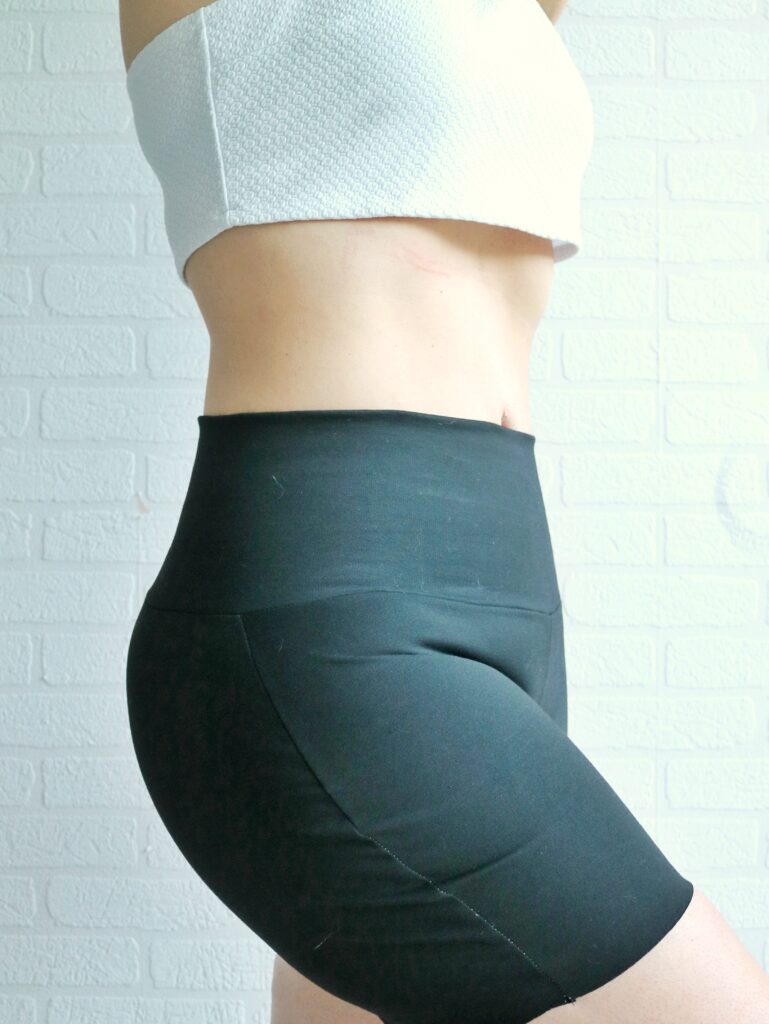
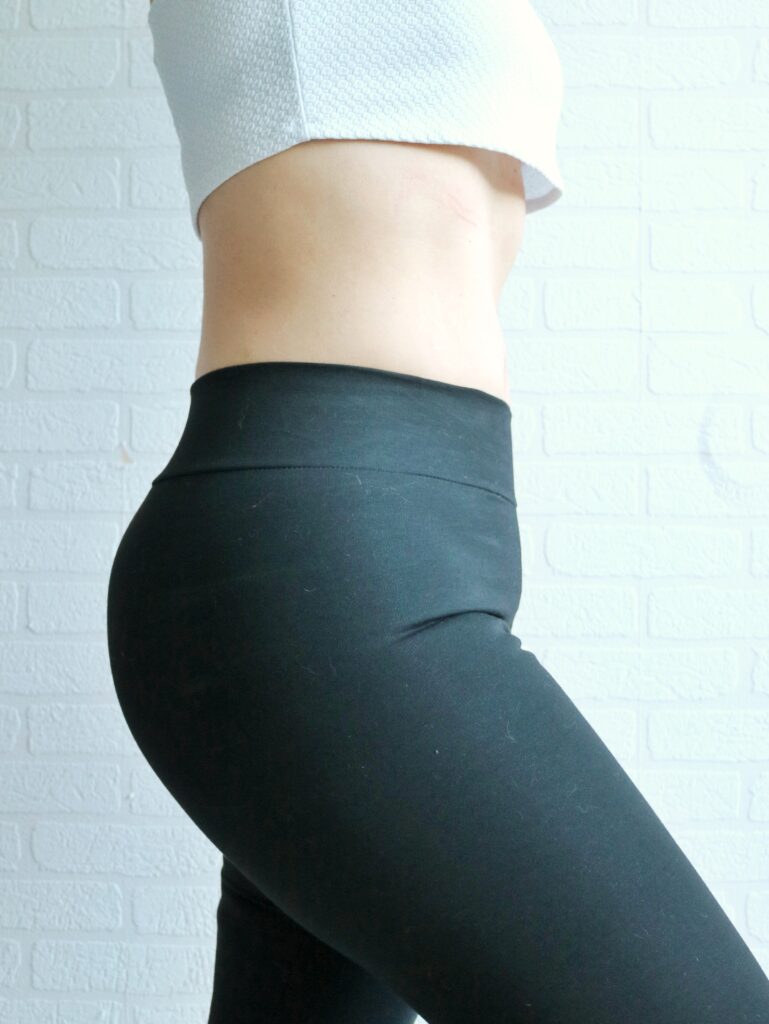
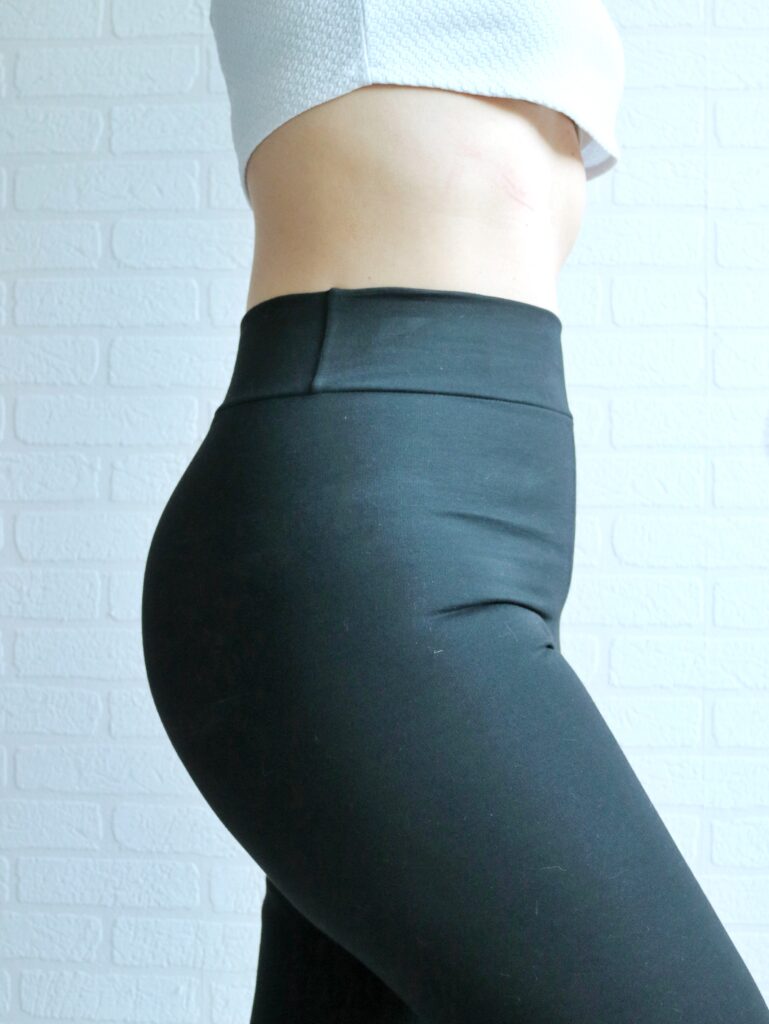
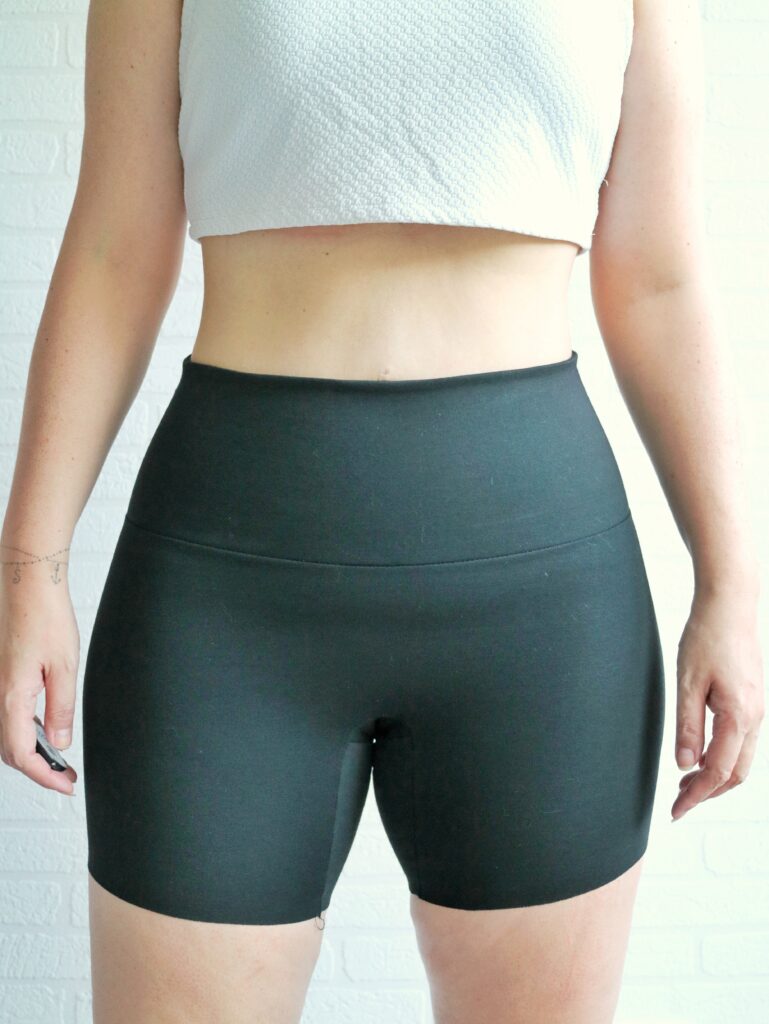
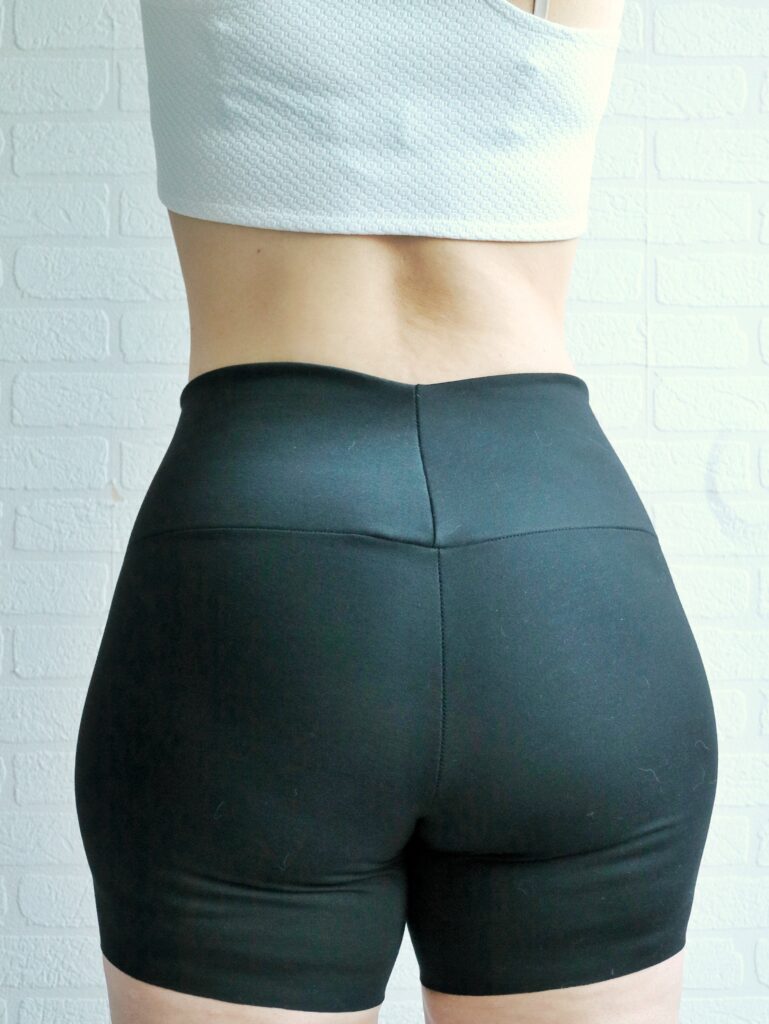
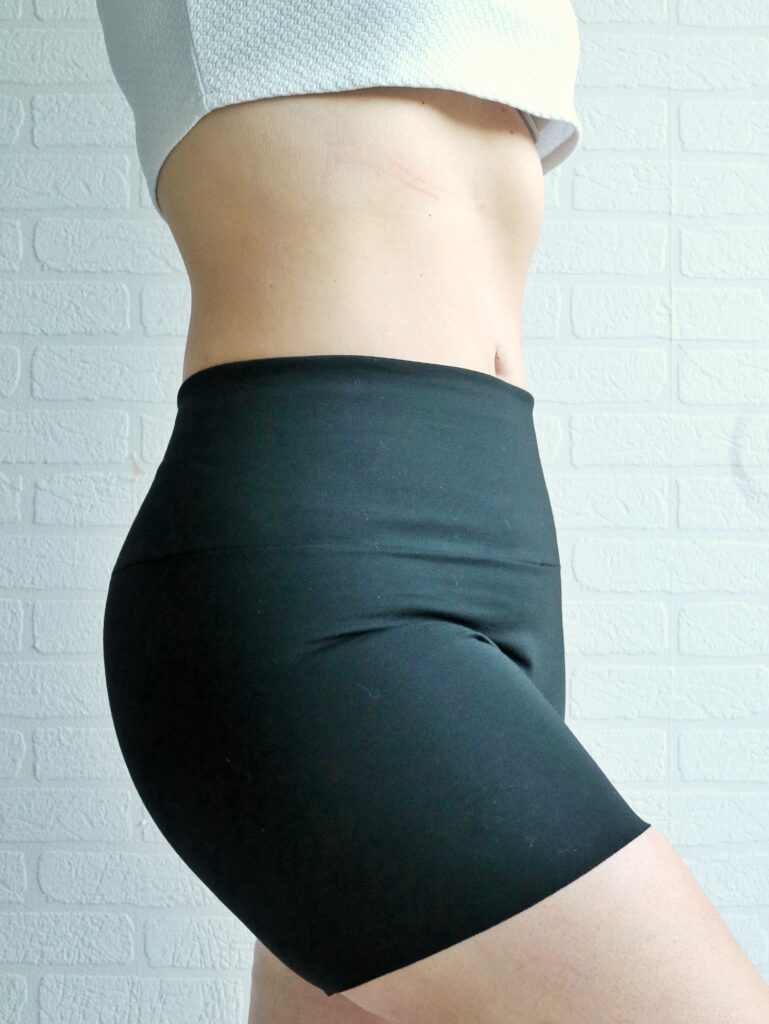
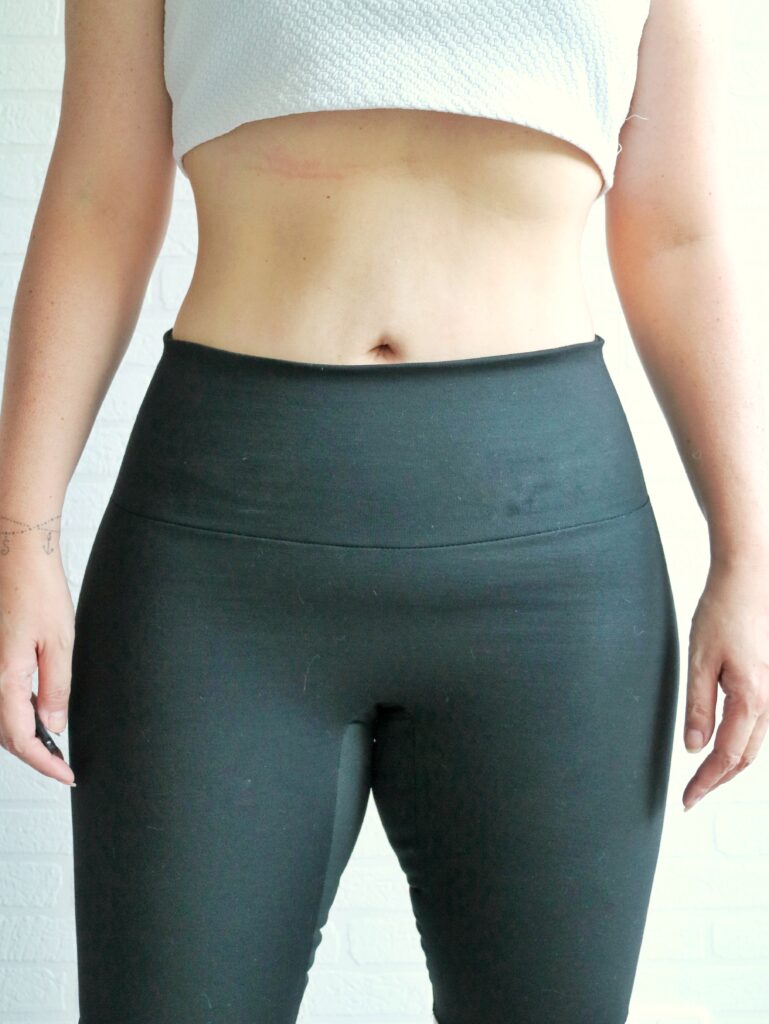
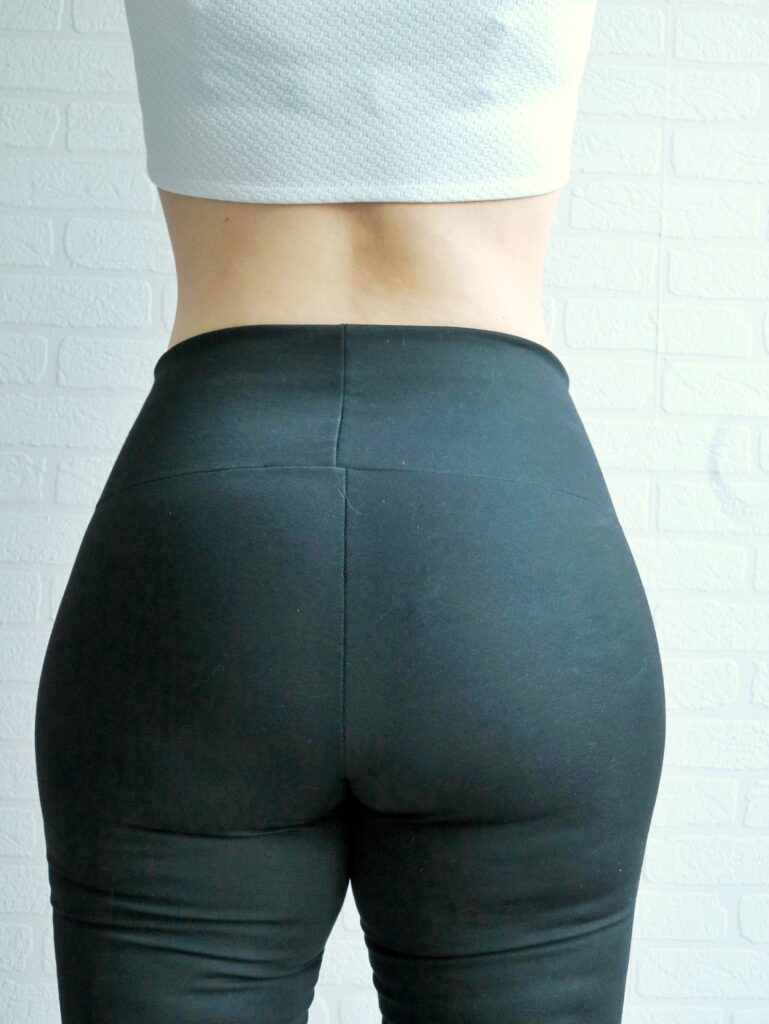
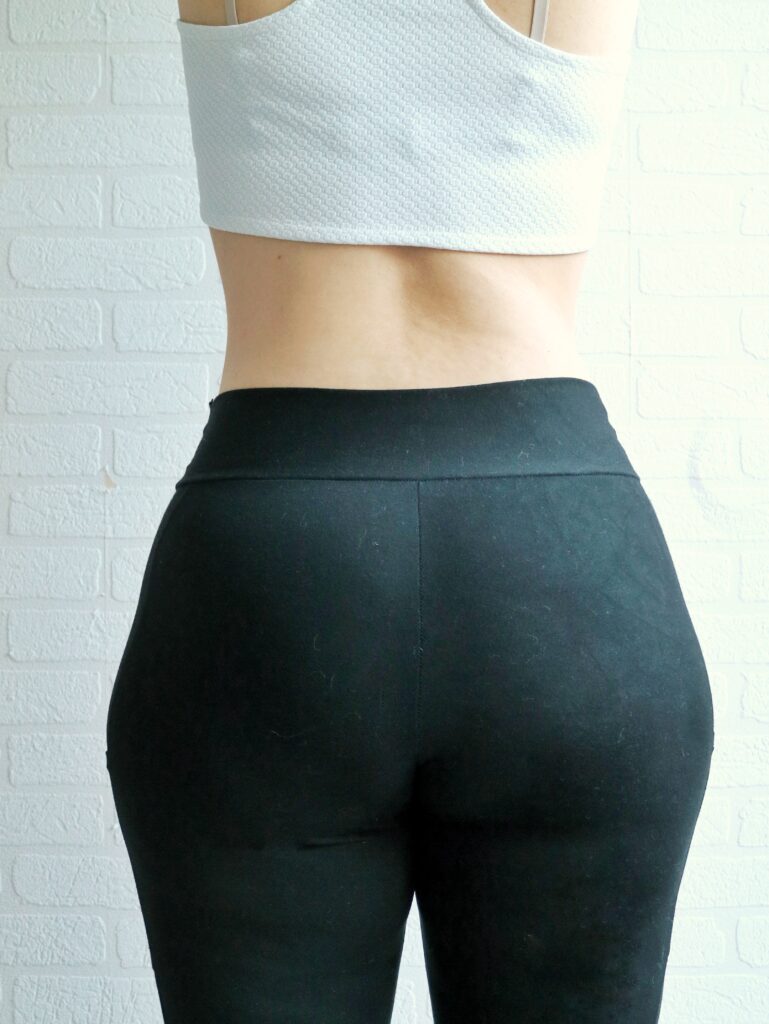
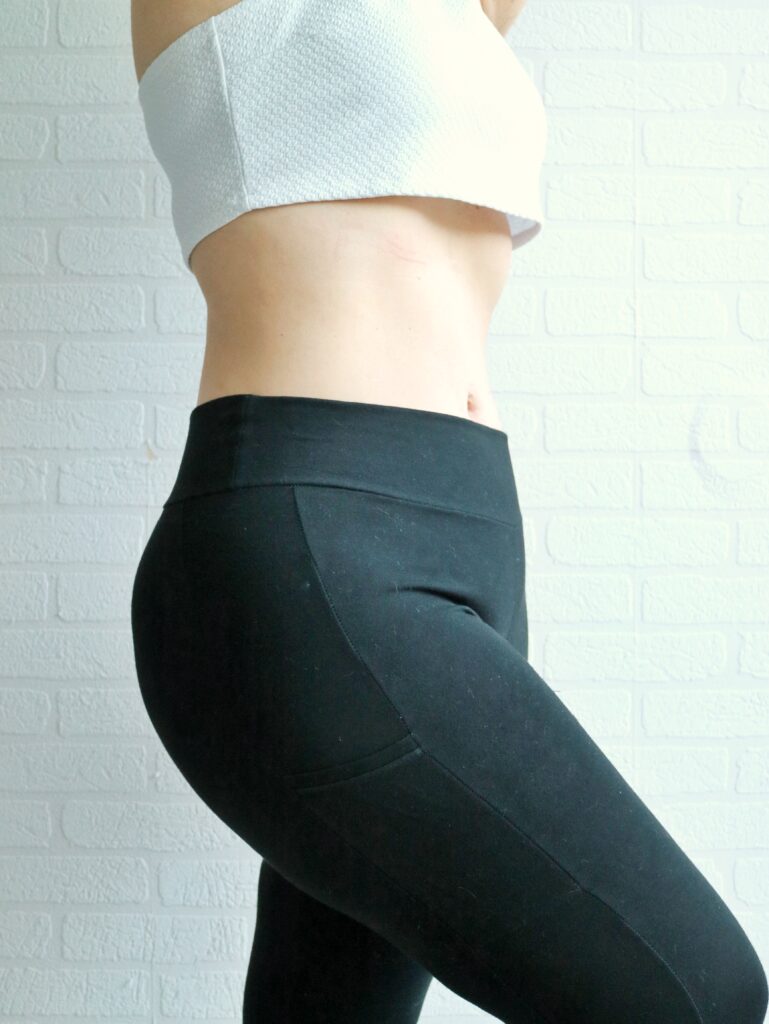
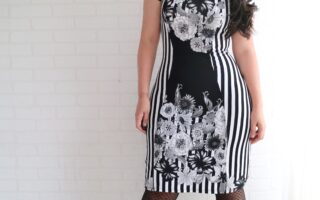
1 – G.O.A.T
- Company – Rad Patterns;
- $ – Paid
- Size made – M graded to XL
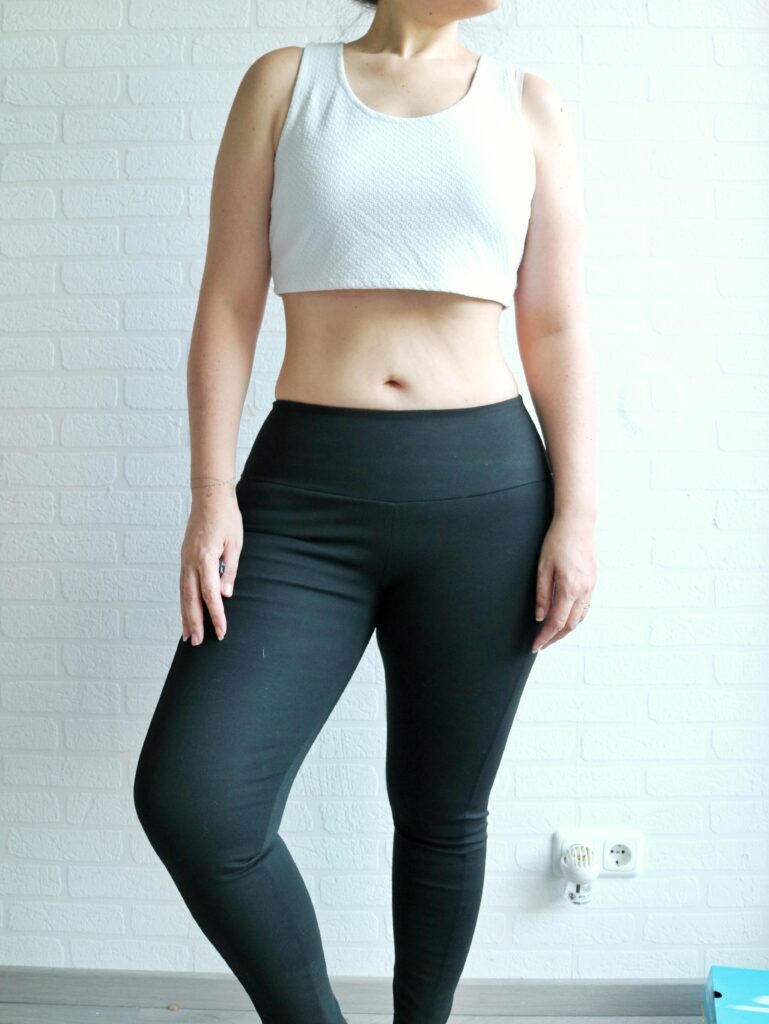
I love this one!
Grading was easy and simple and I got a great fit on the first try.
I simply graded from the waist size M to the size XL crotch line and it worked like a charm.
The legging features a contoured waistband, which I absolutely love, and side panels.
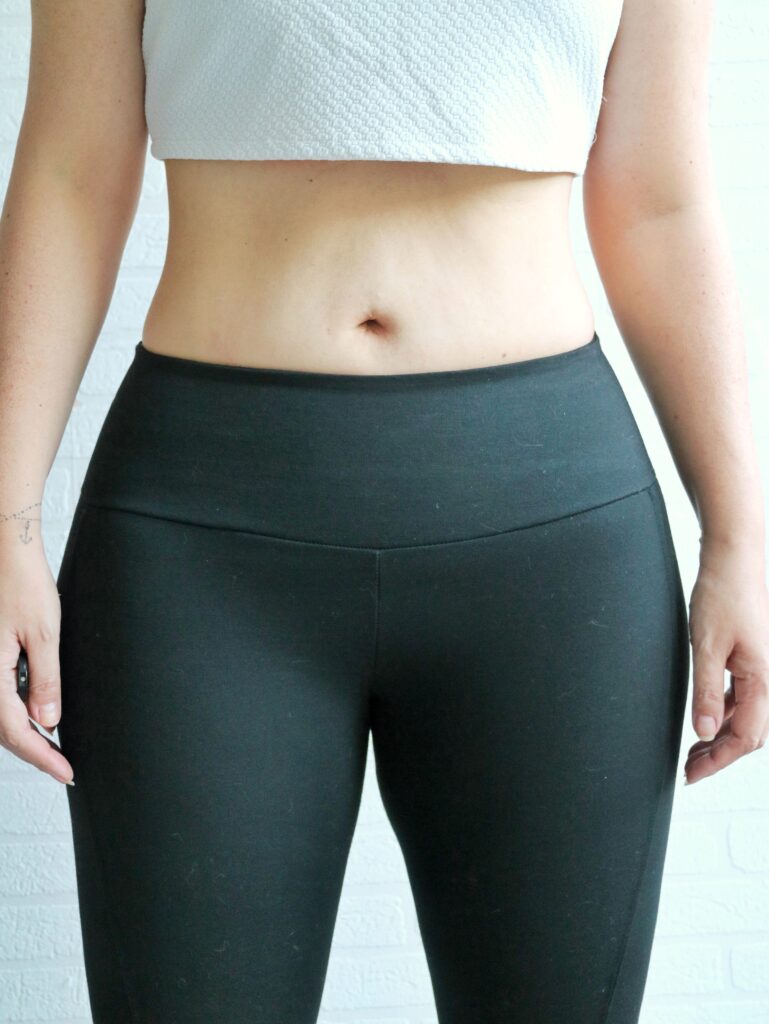
I kinda wish that it also had a no side seams, or a simple seam option because, in my opinion, the panel makes it a bit sportier and as I love it so much, I’d like to have a simpler, more versatile version so I could wear it EVERYWHERE! <3
2 – 20k
- Company – Max & Meena
- $ – Free
- Size made: M graded to 1X and L graded to 2X
This one was a bit more troublesome for me.
The way the pattern is nested made grading more difficult and I couldn’t just smoothly draw a line from waist to crotch curve (I won’t post photos of the pattern pieces, but it’s a free pattern and you can download to check it out and see what I mean 😉 ).
The pattern has a LOT of negative ease and when I made it on my size M-1X I couldn’t get it on as it was way too tight. My fabric is 50% stretch and the pattern doesn’t really specify the % needed, in my opinion, it’s way more than 50%.
I then sized one up and made an L-2X, this is the one you see on the photo above. And while it does look super good on, I felt very squished in it.
In addition to wide hips, I have a round bubble bum and I don’t think that this pattern is drafted for my type of shape, which is totally fine! Not all patterns are for everyone 😉
To make this one work for me I think I’d need to use a stretchier fabric and probably make a full seat adjustment.
3 – ANYTHING BUT BASIC
- Company – DIBY
- $ – FREE
- size made – Misses 10 graded to 18
This pattern is nested a bit differently as well.
All sizes have the same crotch curve and grade out only at the sides.
Because of that I made muslin shorties to avoid waisting too much fabric in the process.
I did 2 versions of it, one as per pattern and one with adjustments. I was still not happy with my adjustments, but ended up running out of time to make a third one.
V1 – pattern as is:
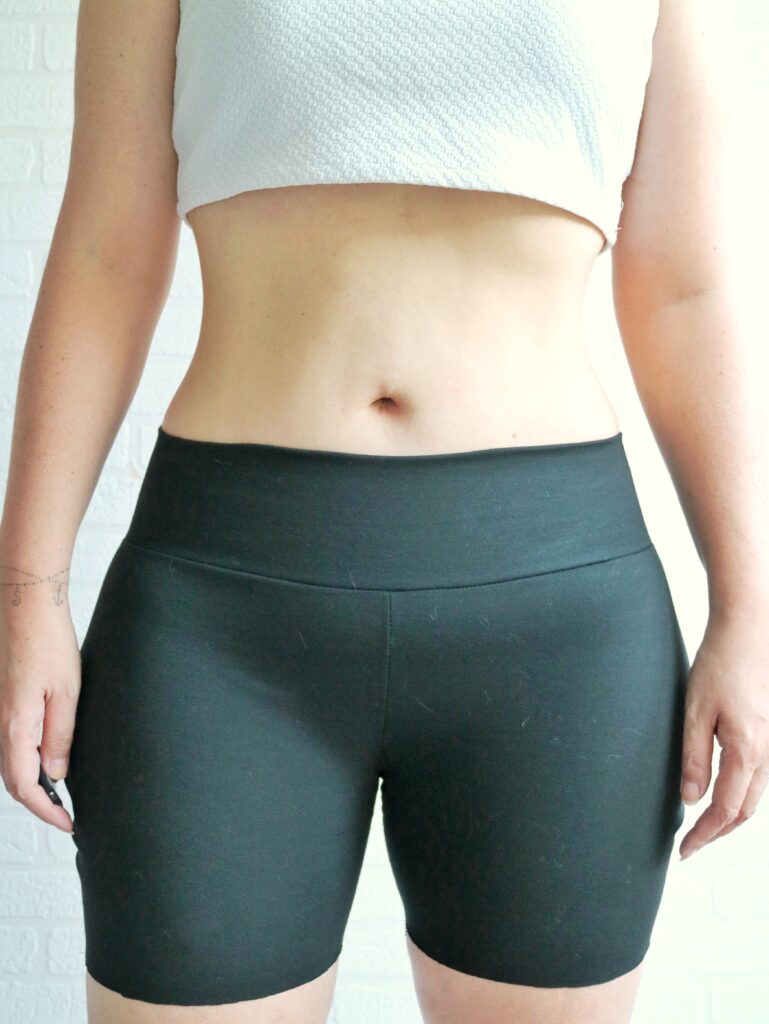
The crotch curve on this one is very short and shallow. As I’d predicted it, the feared camel toe made its appeareance loud and clear.
Also, because I need to grade between so many sizes (10-18) on that short length between waist and hip it made grading a bit difficult. You can see that the sides aren’t smooth, there were wrinkles on the side seam where I needed to fix/smooth that grading line.
The pattern is curves friendly and accommodated mine without any problems. Aside from the CT this first try was very comfortable.
It’s also noticeable that these leggings don’t do anything to “contain” my dip hip/saddle bags. It’s comfortable but not the most flattering…
For the next muslin, I added 1″ to the front crotch and 1/2″ to the back, plus I added 4″ in height to the waistband pattern piece, so 2″ to the final product.
It looks a lot better, the hip dip is more contained, the CT isn’t as bad but I still need a little more length there and the side wrinkles still need more smoothing.
Overall I do like this pattern and am willing to work on it a little more to get it to work for me. Probably the third time is a charm. I’ll keep you posted when I make it!
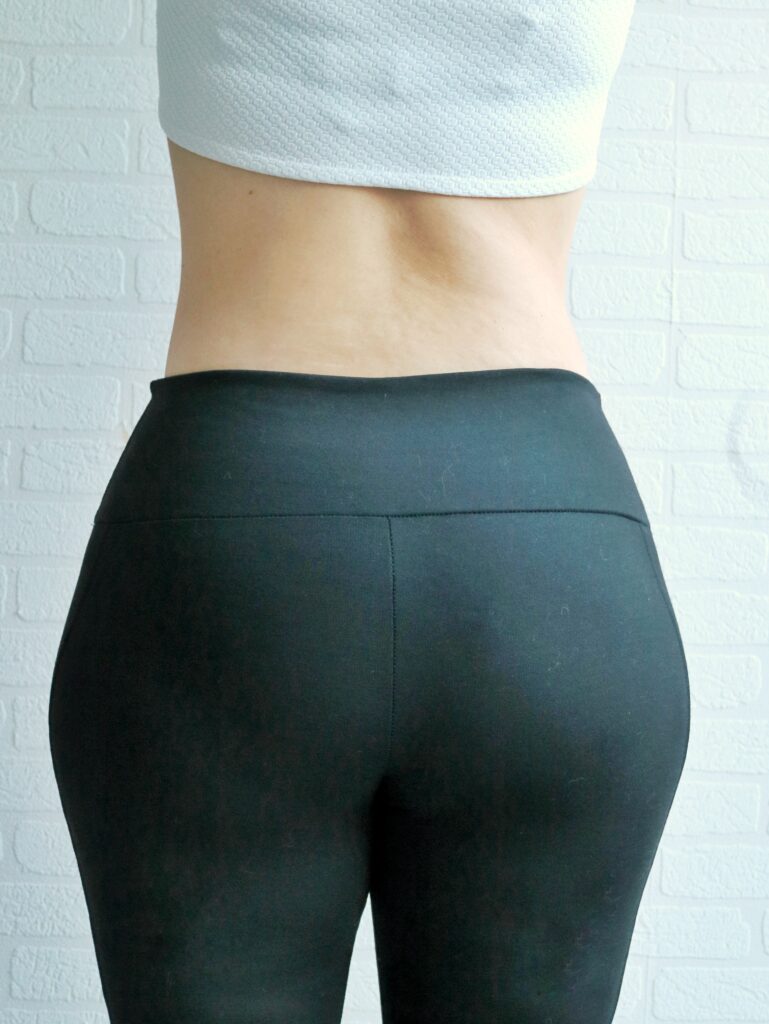
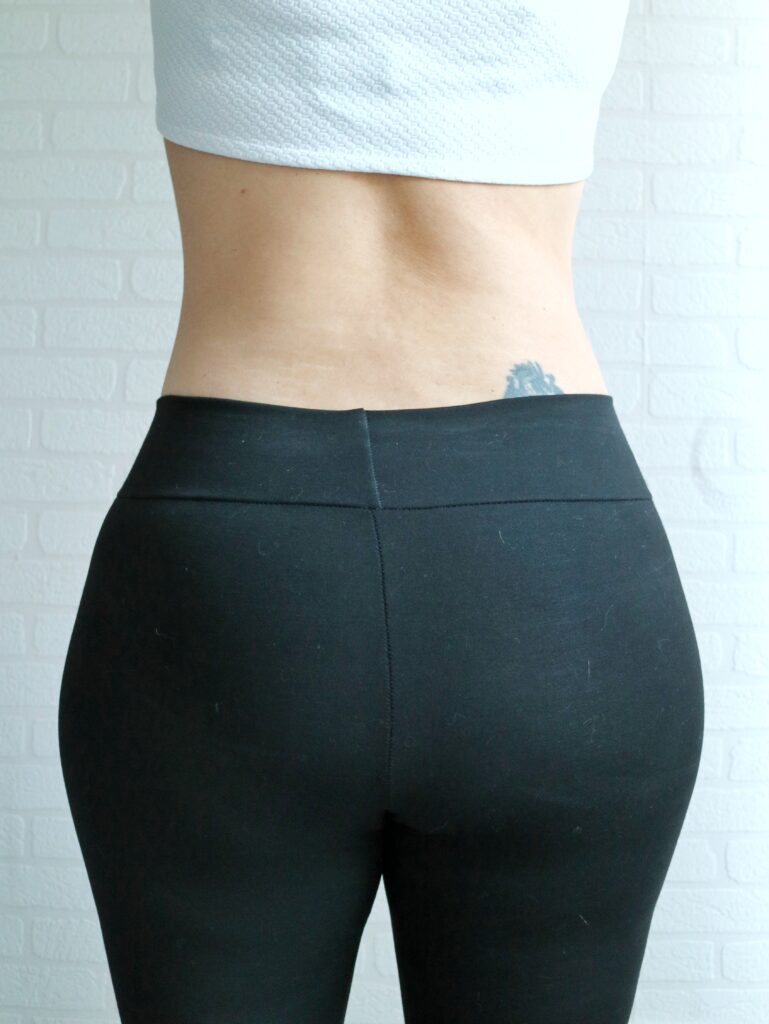
4 – PEGS
- Company: Patterns for Pirates
- $ – Free
- size made – M graded to XXL
This is such a well known pattern that I feel I don’t really need to say anything about it. lol
This was actually my first peg, can you believe it?!
Peg is known for having a lot of negative ease and I concur with that. But it’s not as tight as the 20k one and even though I feel a little squished, it’s not uncomfortably so.
Grading went smoothly and I got a good fit at the first go.
The wrinkles you see on the back legs are partially the snugness of it and partially lack of adjusting when putting it on. This photo session was exhausing! lol
5 – EDEN
- Company – Bella Sunshine
- $ – Free
- size made – 8 graded to 16
This is the one with the highest waist and I love it!
That also means that it takes a bit of wiggling to get the size 16 hips through the size 8 waistband, but I’m ok with that.
This one was also easy to grade and needed no adjusments.
It’s a bit looser around the ankles than the other ones, not enough to award an adjustment though.
It feels a big snugger around the hips for me (you can see it marks my C-section scar), but super comfy on the thighs. It’s most likely due to my derriere and a little modification on my grading would solve that.

This model isn’t as flattering to my bum, unfortunatelly. I’ll still wear it, just with a longer top or a high-low one. 😉
These back wrinkles are definitely caused by not adjusting it properly when putting them on. It was one of the last ones to be photographed and I was so tired by then. Oops!
6 – CLARA
- Company – Jalie
- $ – Paid
- size made – U graded to CC (8 to 16)
This is another case of it being a little different than the other ones and I made shorts so I could test out fit/grading first.
Clara doesn’t have a front seam and features a high wasited contoured waistband. Love!
V1 – made as per pattern
Why did I wait so long to purchase and make this one? It’s been on my wishlist forever.
I always heard great things about this one and it did not disappoint!
It’s so super comfortable and very flattering to the body.
As I mentioned above, it has no front center seam, and this one features a gusset that is non-optional.
It was my first time sewing a gusset and it was way way waaaaaay easier than I thought it was. 😀
One thing that will take getting a bit used to is the gusset showing a bit at the crotch.
On me I feel it’s more pronounced than on others that I’ve seen posted around, so that will take a bit of research and playing around to figure out. I’m pretty sure it’s the bubble butt being difficult again.
On this V2 I raised the back rise by 1 1/2″ to see if it would help any.

It didn’t, but I do like the higher back rise.
Again, the back wrinkles is my fault for not properly adjusting the shorts.
This one does look the bum look good, doesn’t it? haha
7 – Bonus: MyFit
- Company: Apostrophe
- $ – Paid
- size made: made to measure
I had decided not to add this one to the experiment becuase as it’s generated to your specific measurements, it wouldn’t be a fair comparisson.
But it does deserve a mention because it’s been my go-to ever since I tested it.
This is an older one that I used a ton, it has the regular waistband and side pocket option.
What can I say… it’s made to measure. It fits me perfectly everywhere and it’s super comfortable.
The generator does need a TON of measurements (it’s quite a marathon) and it may take a couple of tries to get it right, but it’s worth the hassle. 😉

PHEW!!
Did you manage to get though it all? 😉
I’ll probably be editing this post to add more thoughts and notes that I may have forgotten, but this is the gist of it all for now.
Here are the links to the patterns featured:
G.O.A.T – Rad Patterns
Clara – Jalie
Anything but Basic – DIBY
Eden – Bella Sunshine
Peg Legs – Patterns for Pirates
20K – Max & Meena
MyFit – Apostrophe Patterns
Huge thank you to RAD Patterns for sponsoring this month’s experiment by providing us with the G.O.A.T. leggings (Greatest of all time). Stephanie has kindly provided a discount for you to try the G.O.A.T. pattern, available in the announcements of Friends of the Fitting Experiment. Check out the group to see how others made out with the leggings. You can also visit the bloggers for their full review by following the links below:
xxx
Livia
Thank you so much for your post!! Have been thinking about leggings for some time, but afraid to try. I’m short, 5’2″ and my hip/butt are similar in shape to yours, but much more pronounced. Even tho I’m short, I also prefer a higher rise. Your explanations are super helpful. I will be referring to them many times as I choose which pattern(s) to get first and again while I’m prepping/sewing. Thank you, thank you!
It makes me super happy to know the post is helpful!
Thank you!
Good luck and happy sewing <3
You mentioned ” camel toe” in one of the leggings. What is that? I’m a newbie.
Hi Karen!
It’s when the crotch curve is too small and it gives us a “front wedgie” 🙂
Thanks for reviewing all these patterns. I’ve only made Pegs but have been curious about others. Which is snugger, GOAT or Peg?
Hello!
The Pegs are definitely snugger 😉
Just to add that there is an option to sew the Jalie Clara without a gusset for those with gusset phobia (although it’s nowhere near as tricky as some fear). The hack can be found on the Jalie blog. I’d never made leggings until l made the Clara in Meryl for an all-day exercise workshop and I made the same version as yours. What a revelation!
Yes, I saw that. I’ll be definitely be giving that a try!
But probably not in the next few days… taking a break from leggings for a bit haha
I would love to know the pattern for the white crop top
Hi Sherry!
It’s a hacked version of the Double Take Tank from Winter Wear Designs.
I wrote about it on this post:
https://liviality.com/resewlutions-sew-yourself-some-love/
Thank you!!
This is such a helpful post! I’m always curious about the fit of certain legging patterns, since there are so much to choose from. Wil you also try the Ellie and Mac one in the future? I don’t remember seeing it on your blog(but I might be wrong!) Also, can I ask where you find your ponte fabric? Thanks!