Tryout Tracksuit – George+Ginger
Hey, look who is back with a follow up post in a timely manner? 😀
Yesterday wrote about the Team G+G collection in general terms, today I’ll be chatting specifically about the Tryout tracksuits that I made.
I’ll try to be quick and to the point, because it’s my kids’ birthday (how am I mother to 14 yo’s already??). The plan was to devote the day to them, but they’re so engrossed with their gifts at the moment that I’m left sitting on my hands haha.
SIZING
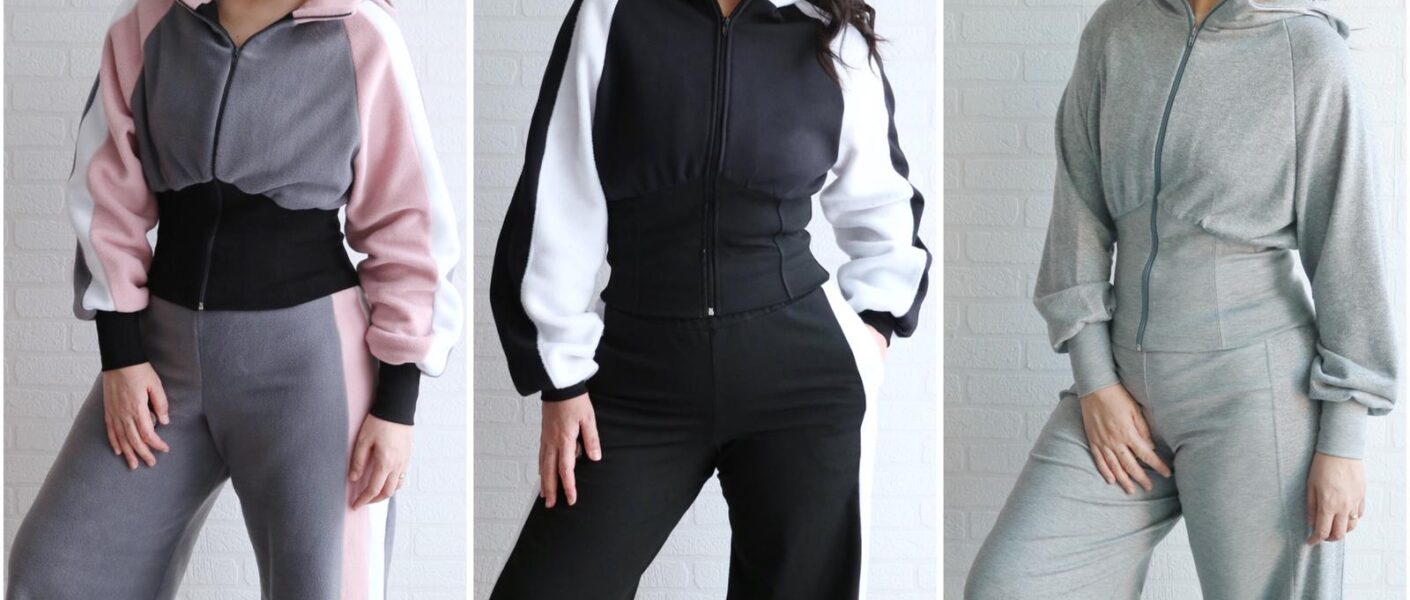
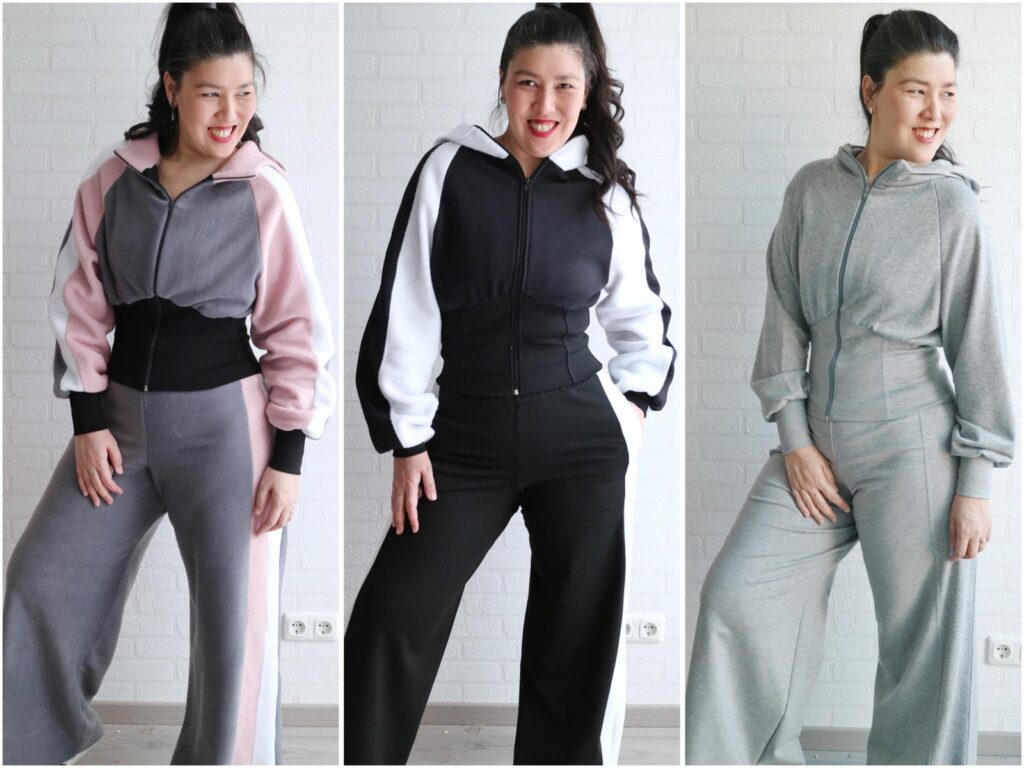
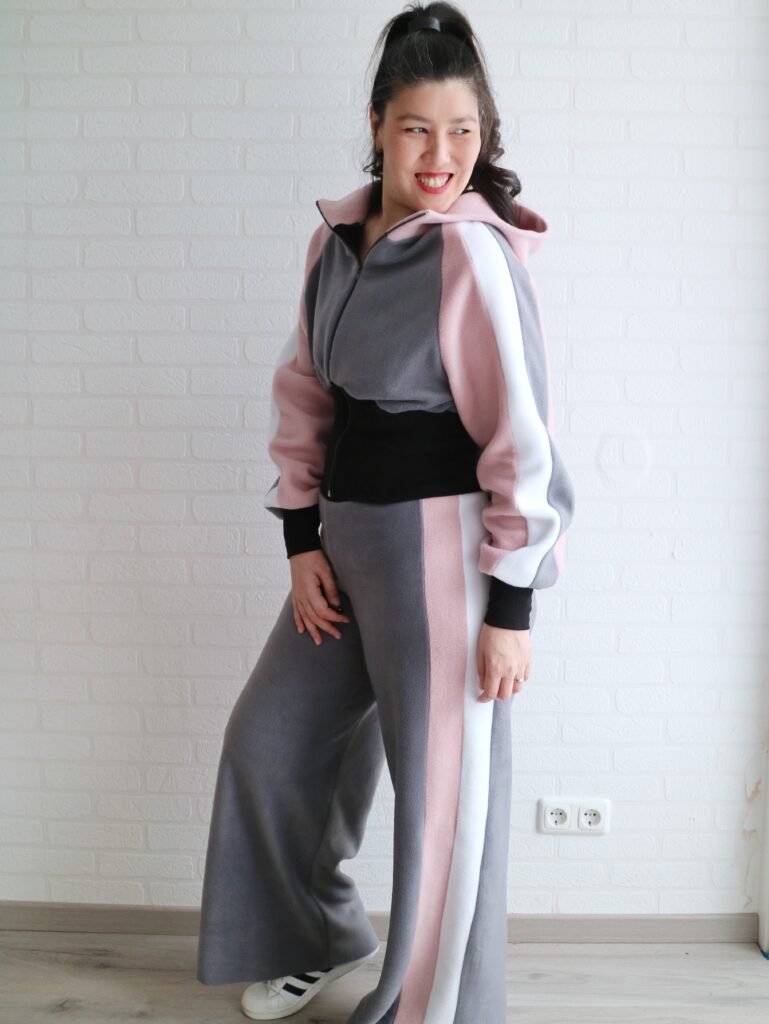
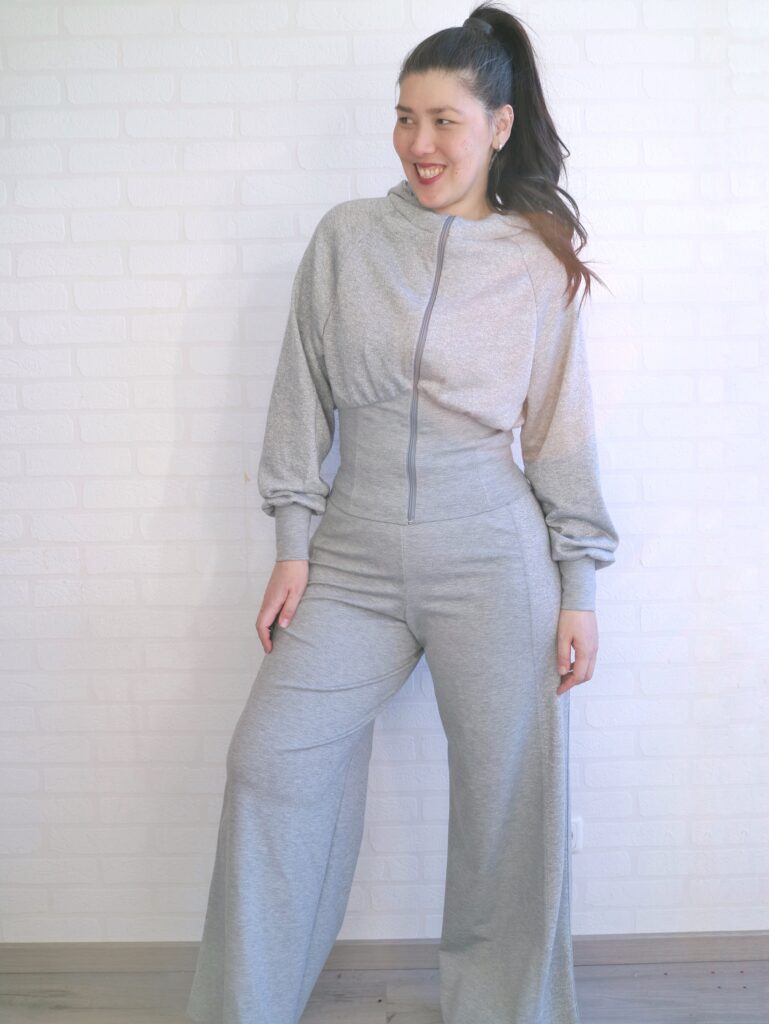
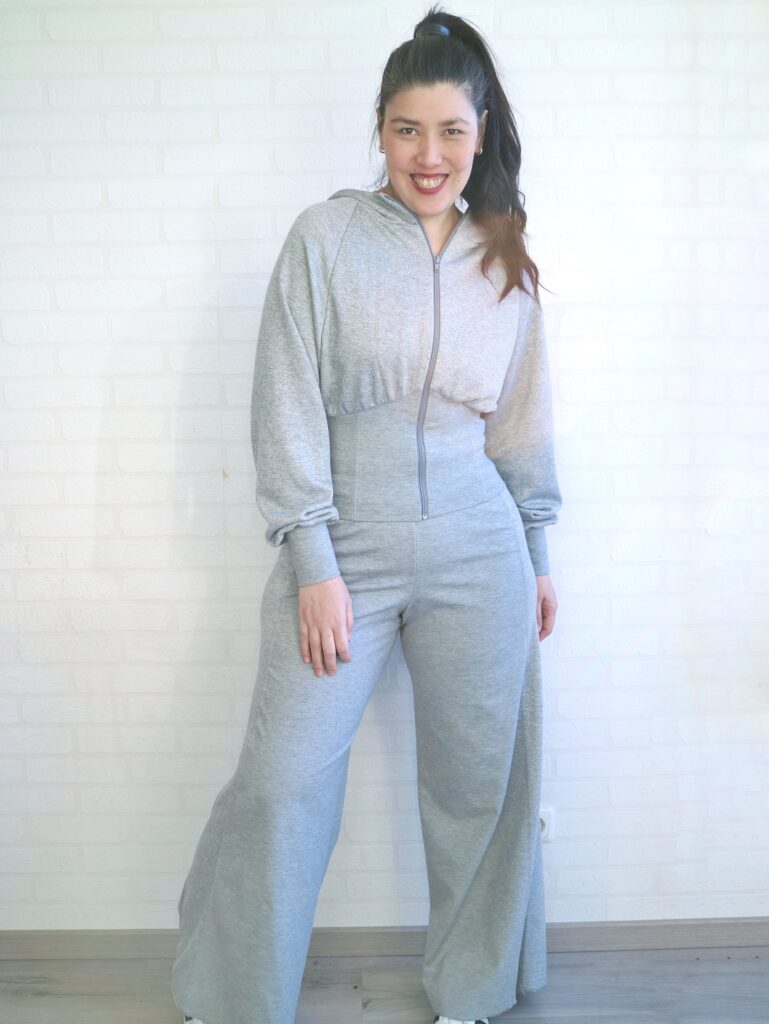
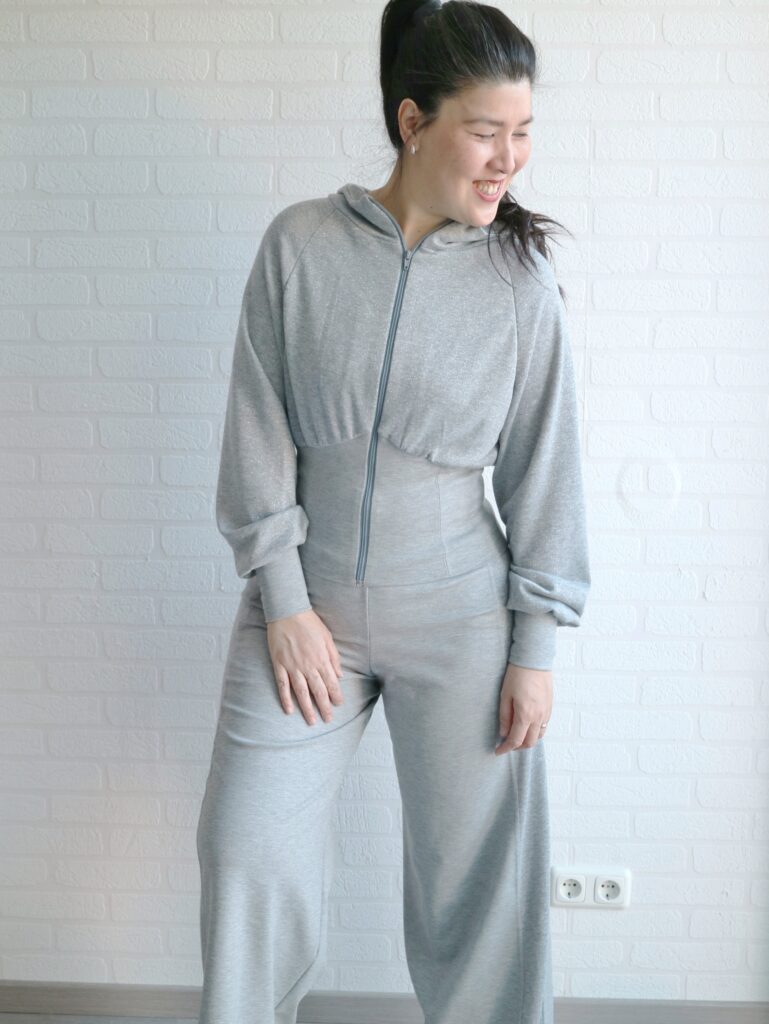
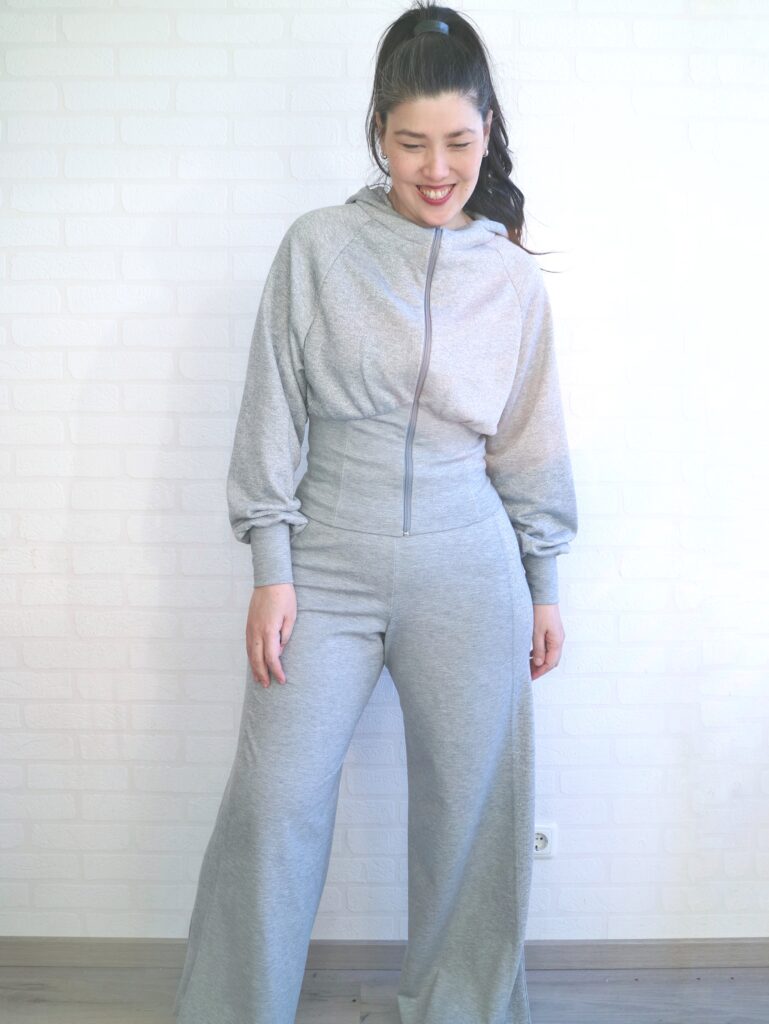
I made a size 8 jacket and size 10 graded to 20 pants.
FABRICS USED
- Fleece;
- Ponte;
- French Terry;
- Rib Knit.
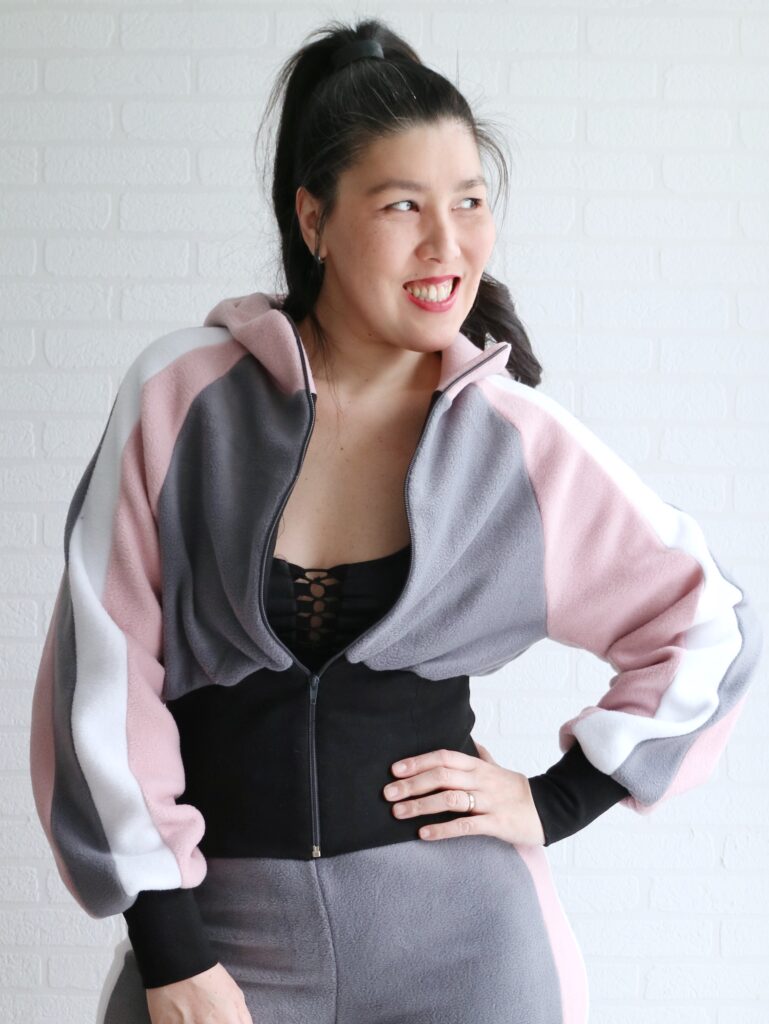
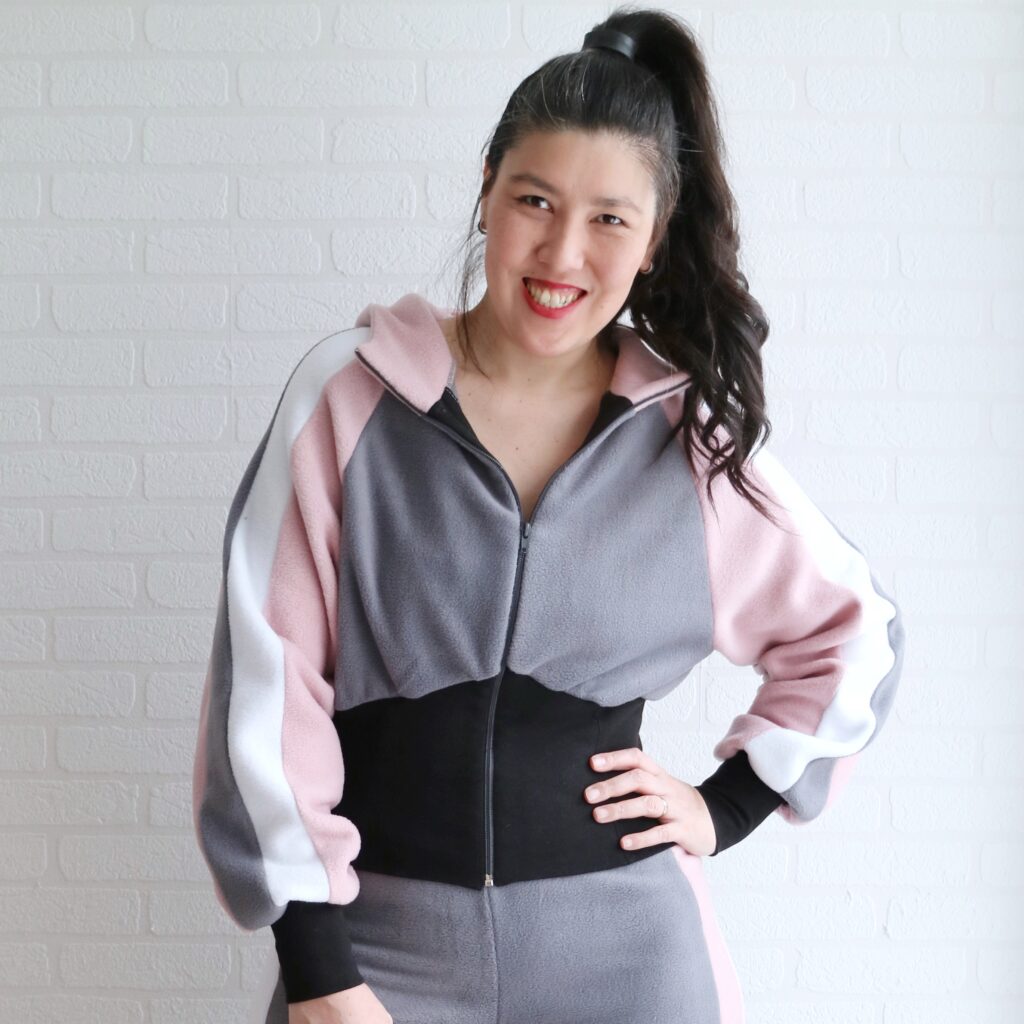
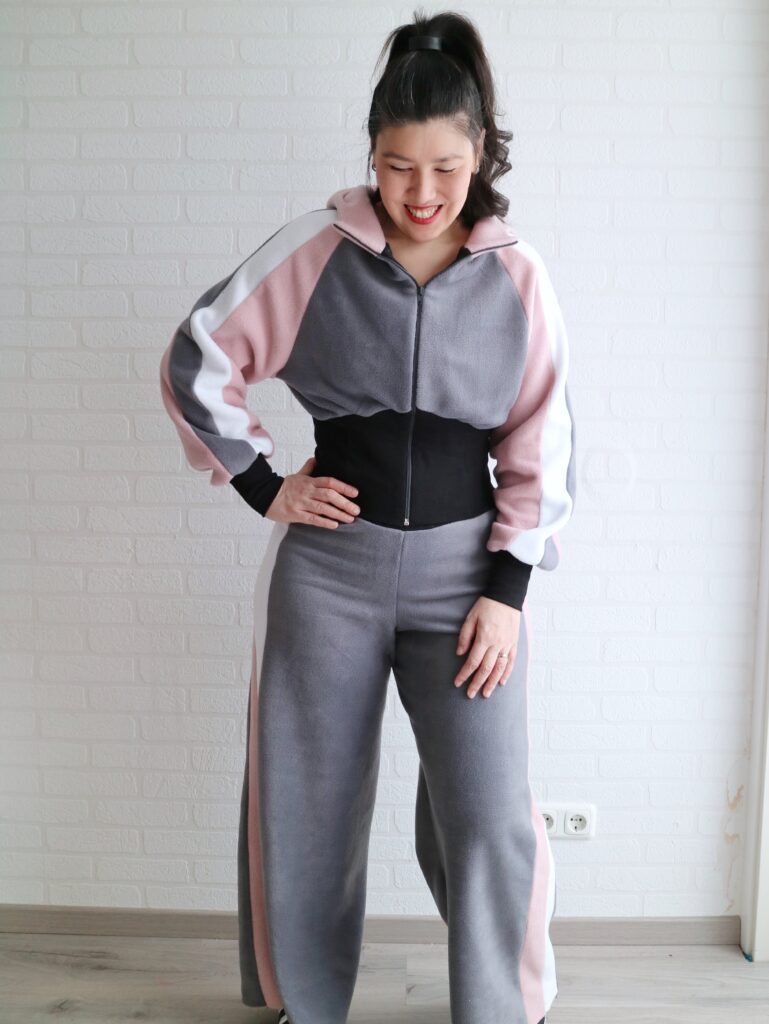
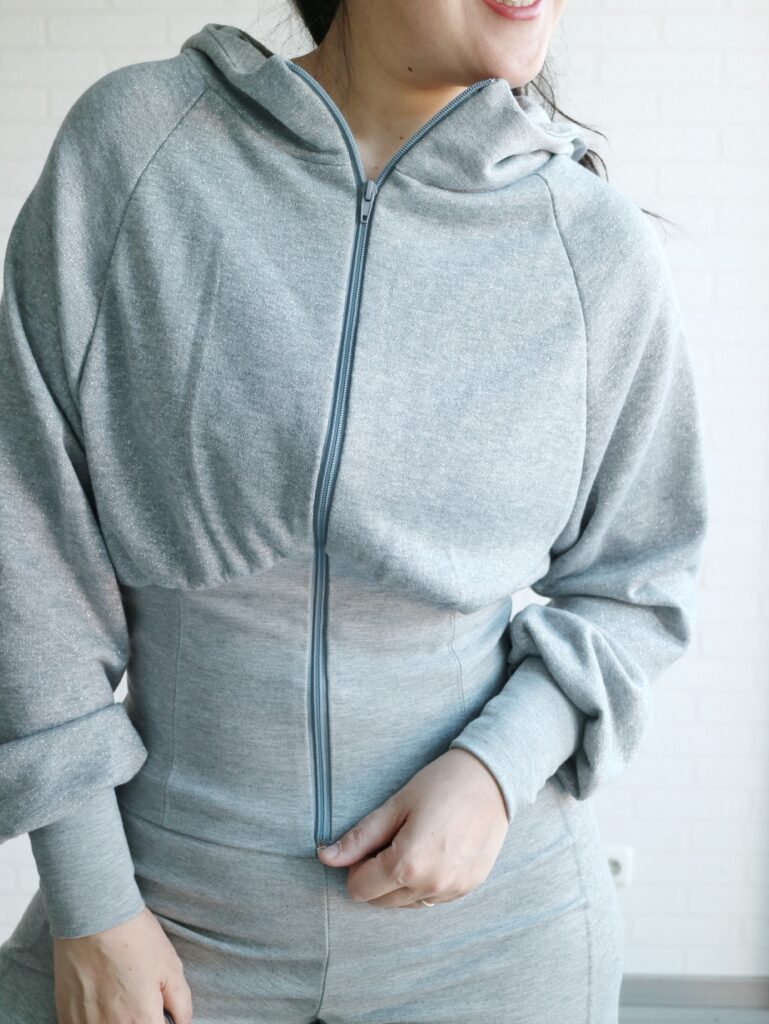
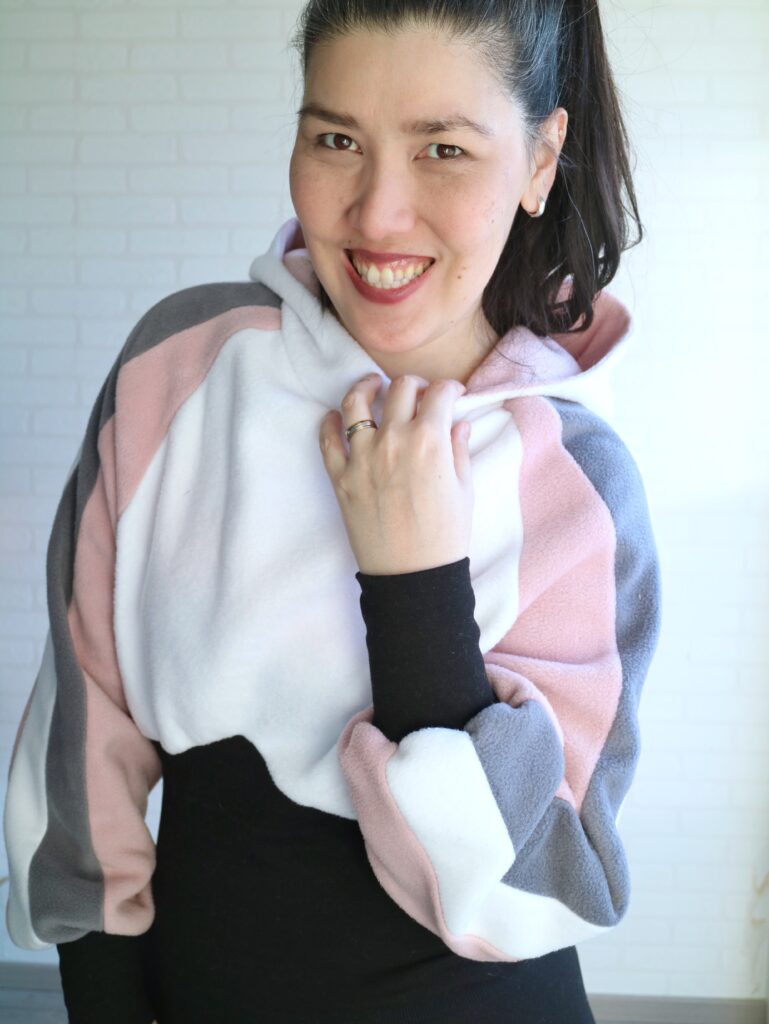
How can a tracksuit make you feel fancy?
It doesn’t make a lot of sense, but that’s what this one does… I put it on and immediately feel like I belong in a fancy ski resort. haha
Also, can we talk about how theses colors give it an optical illusion my hips are way smaller than they actually are? lol


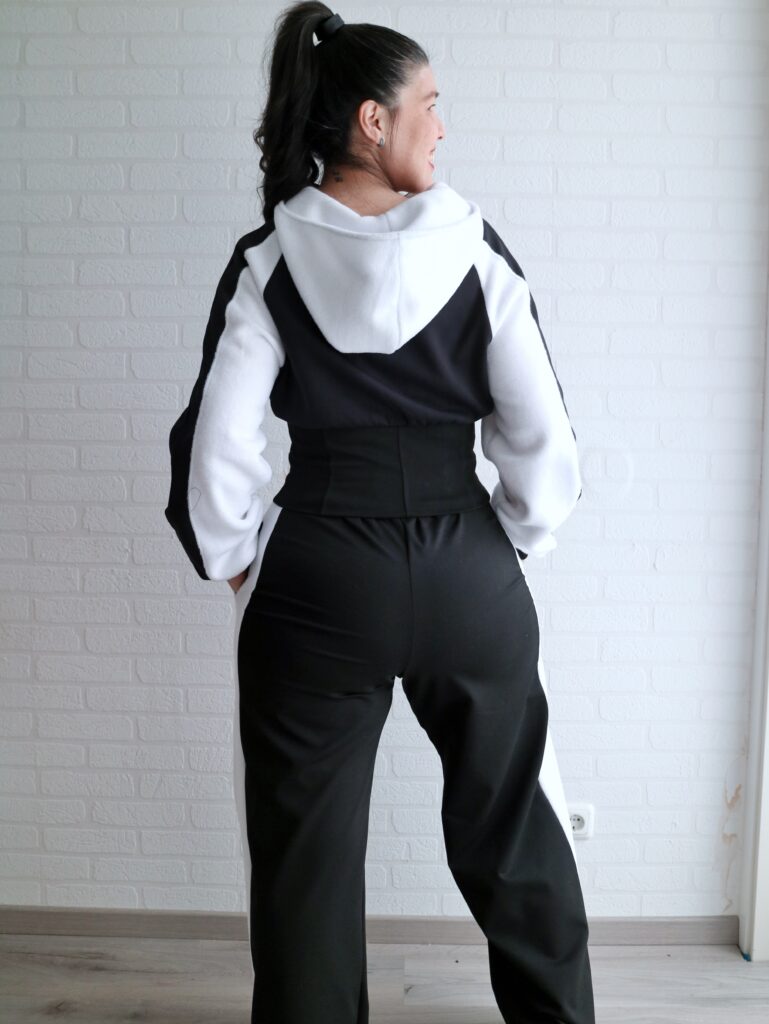
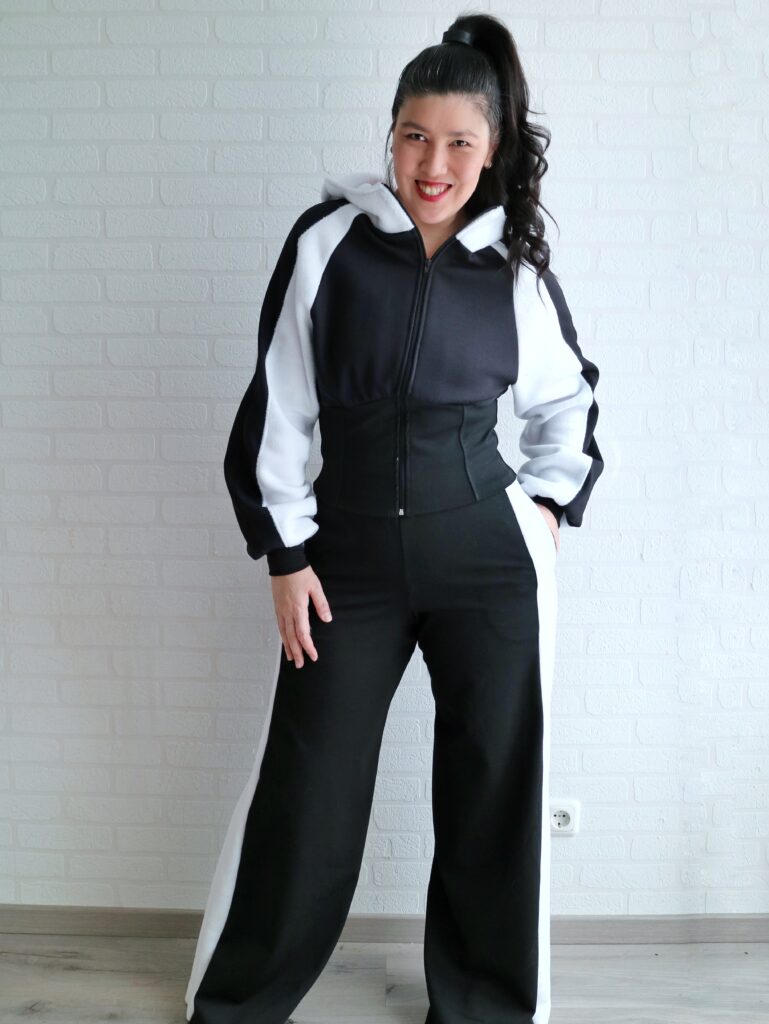
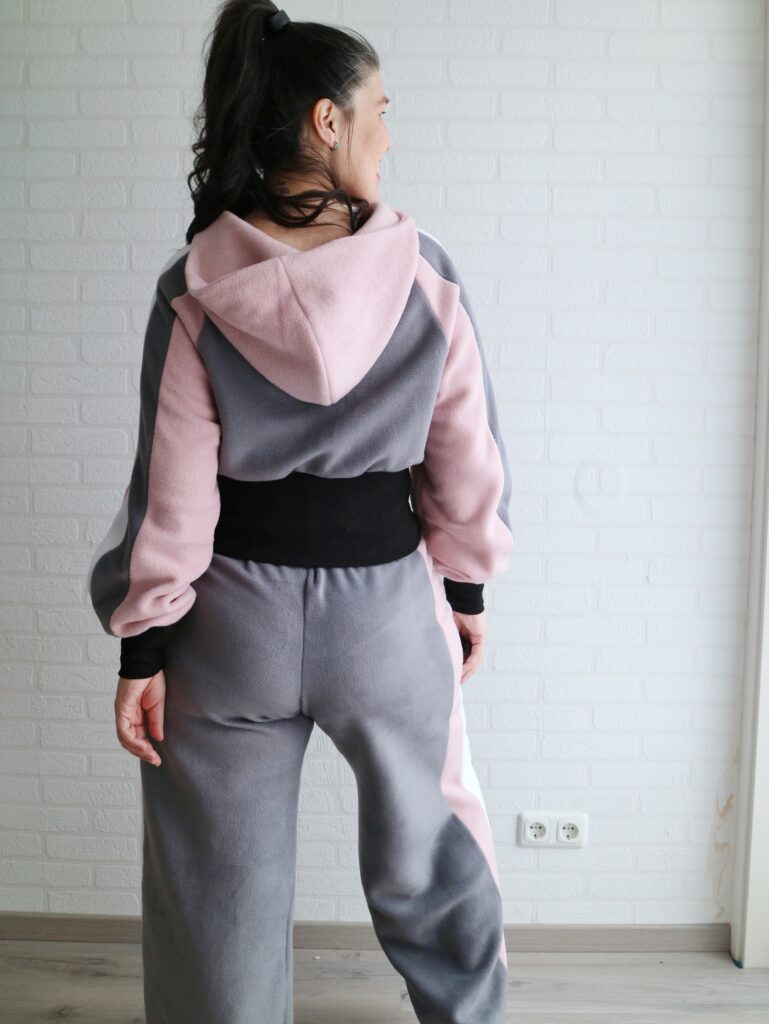
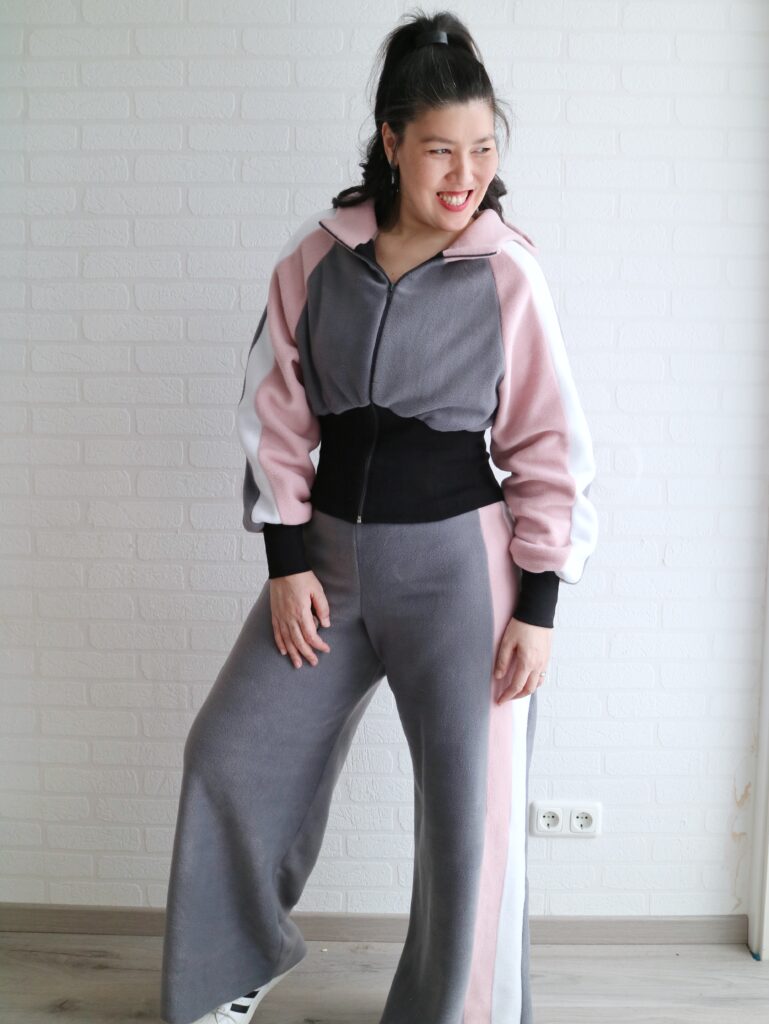
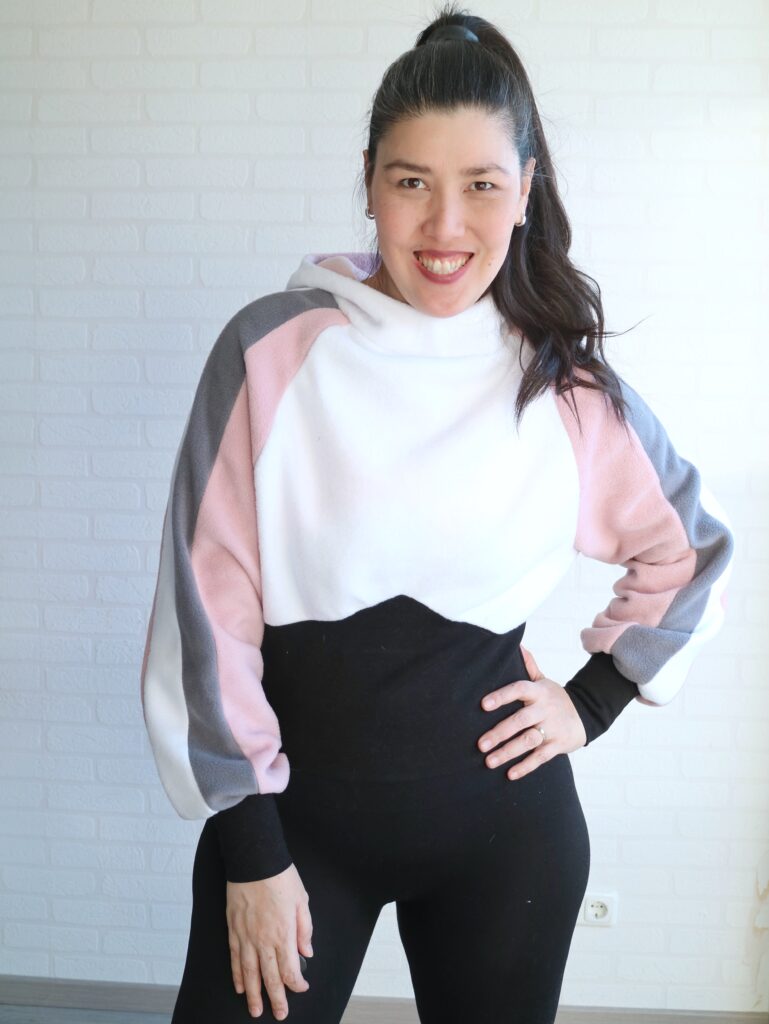
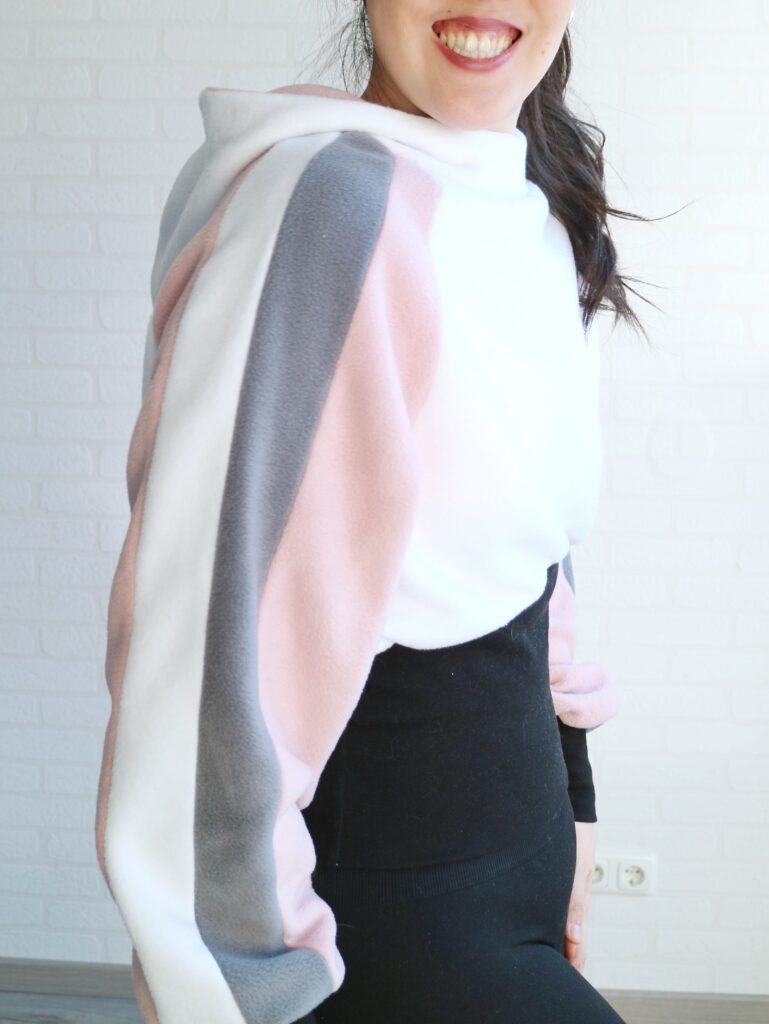
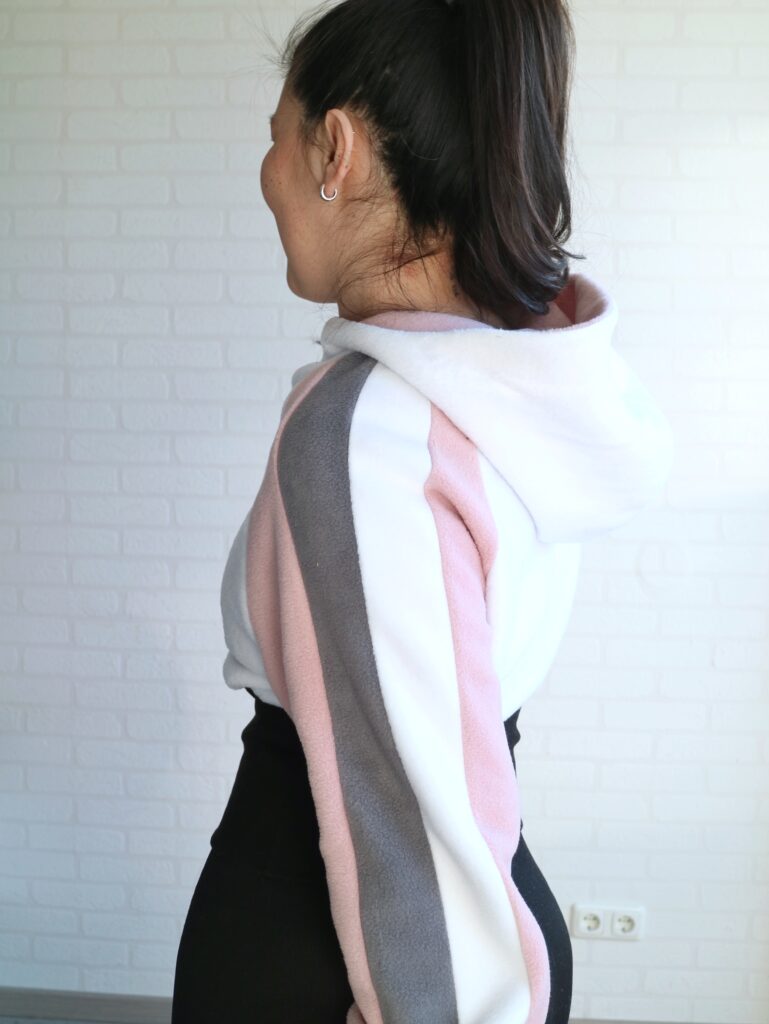
This one is a bit of a mish-mash of fabrics.
I used Fleece for the jacket sleeves and hood, sweater fleece for the bodice, rib knit for the waistband and cuffs, Ponte for the main part of the pants, and fleece for the pants stripes.
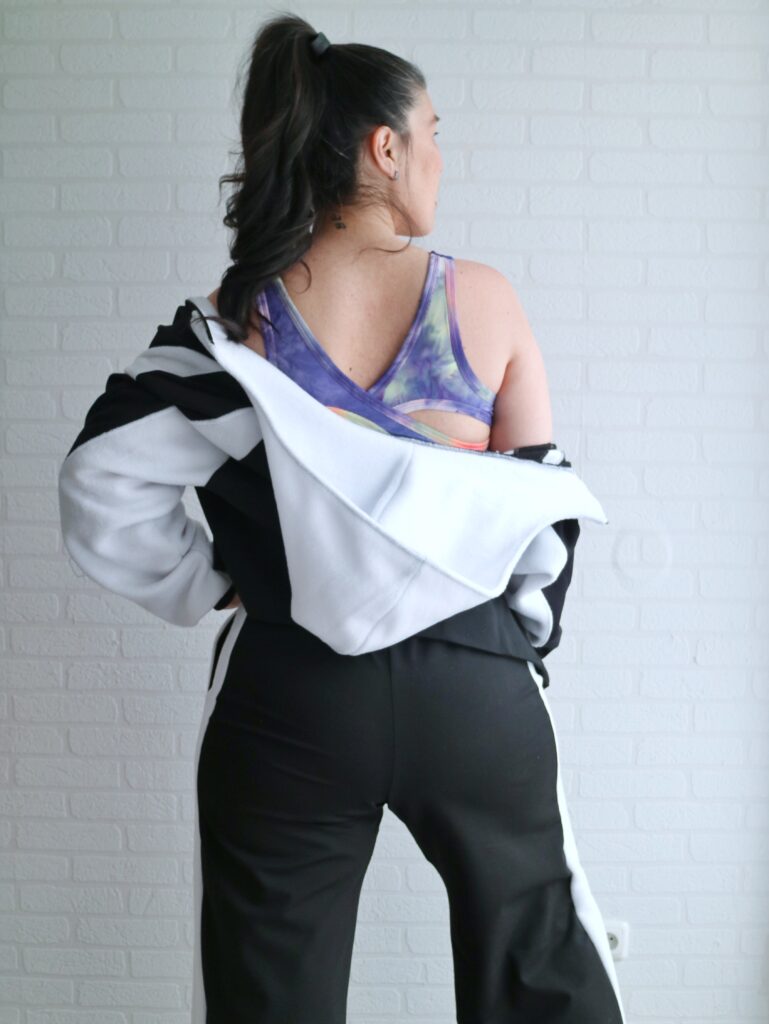
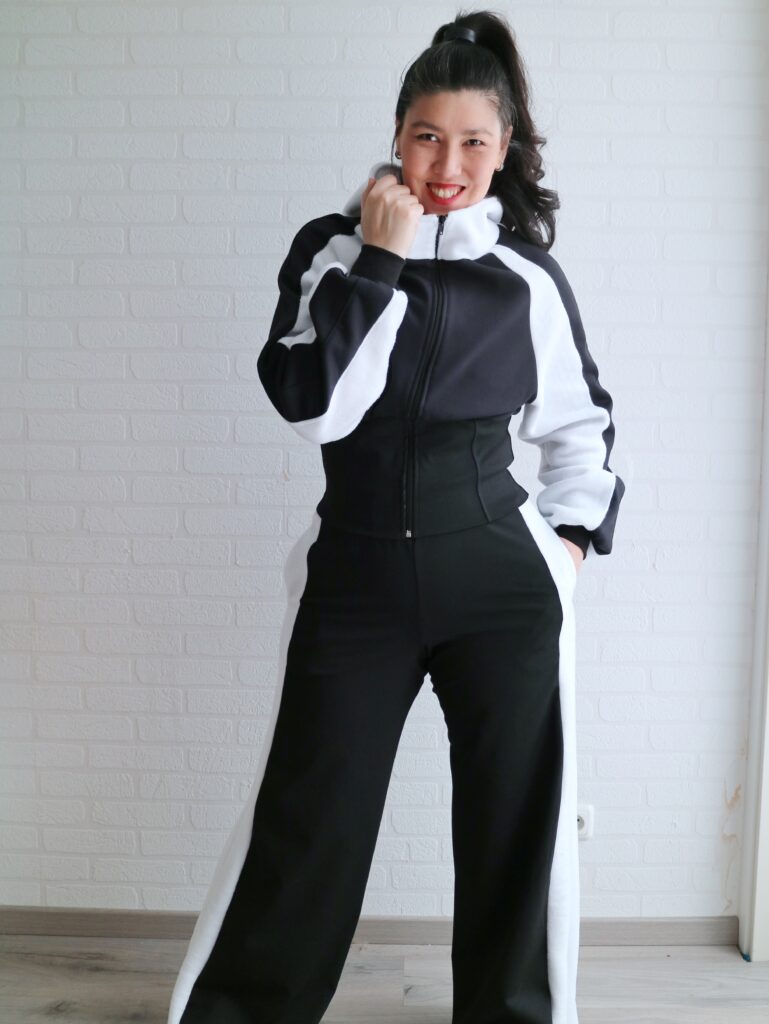
It all worked out perfectly!
This black Ponte is very heavy so all the fabrics have about the same weight and thickness, so there’s nothing off-balance. Plus, I love the fullness the fleece gives to the sleeves.
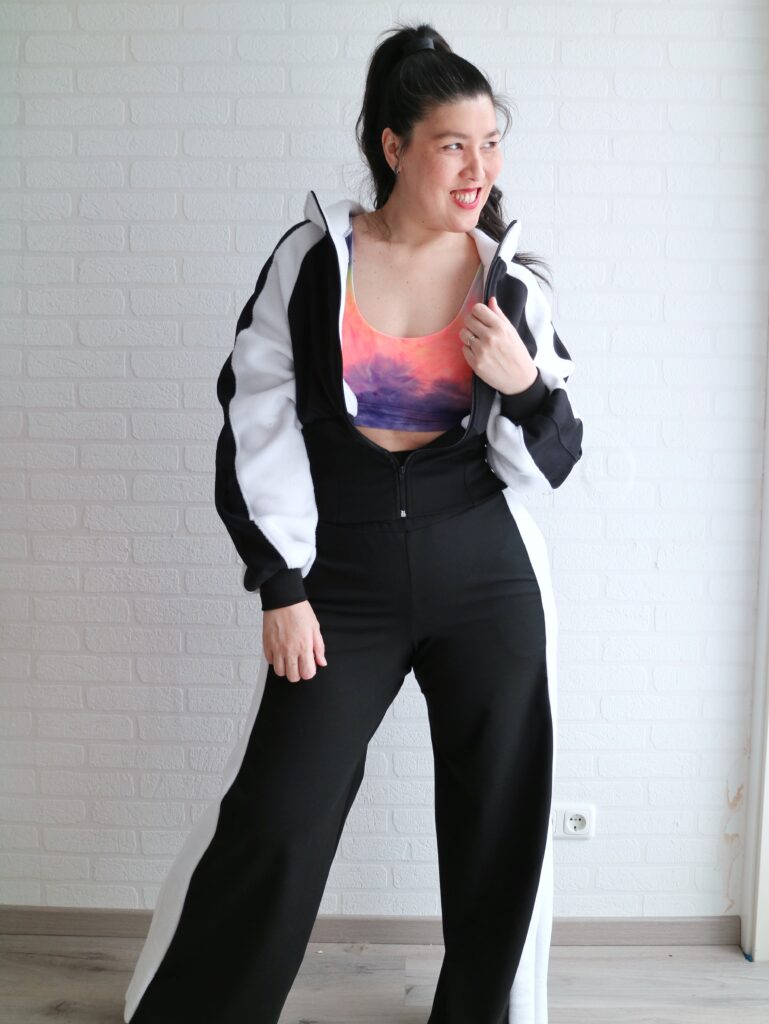
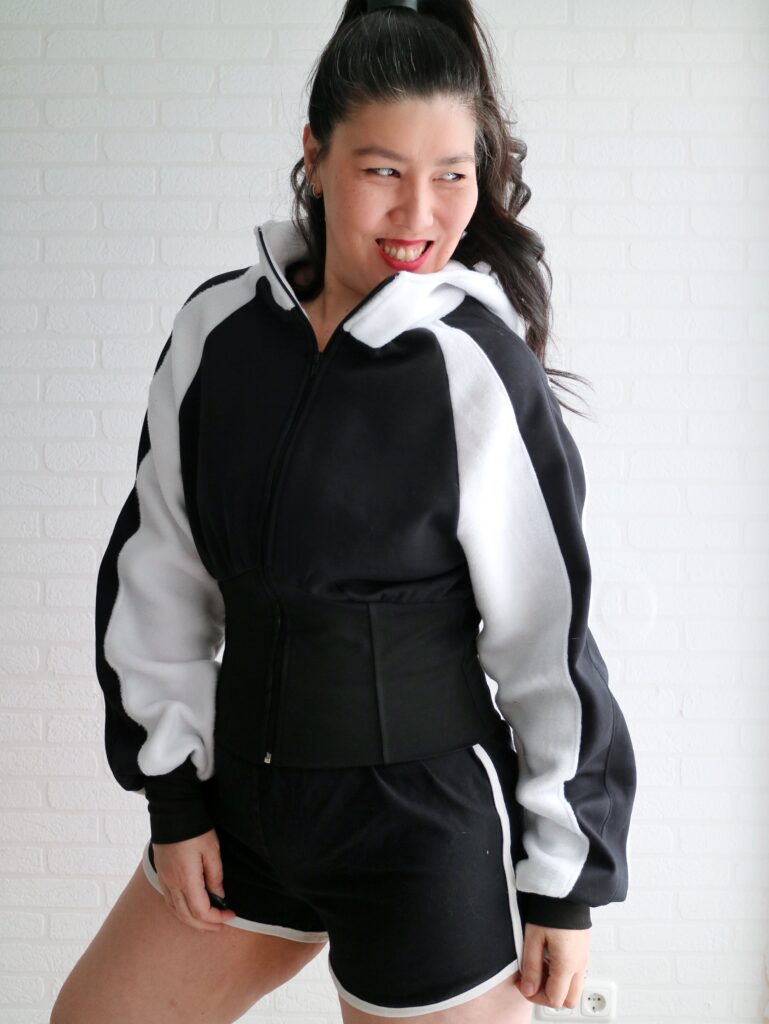
The jacket is also super cute when paired with the Roller Romper shorts.


Ok, on to the next! 😉
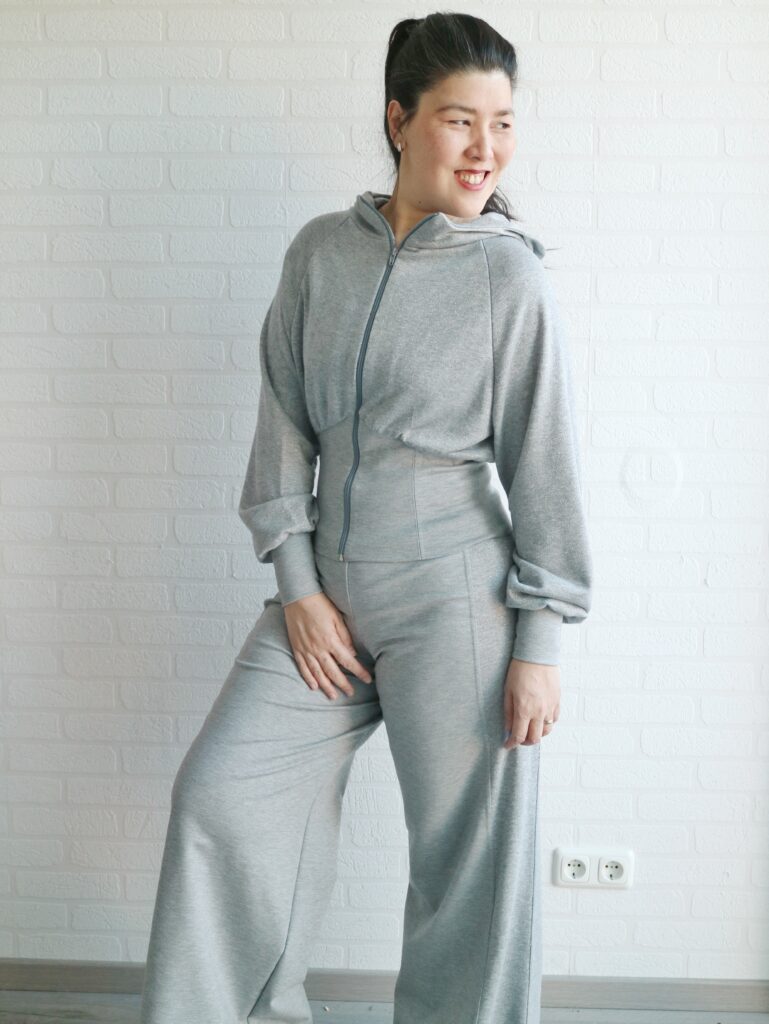
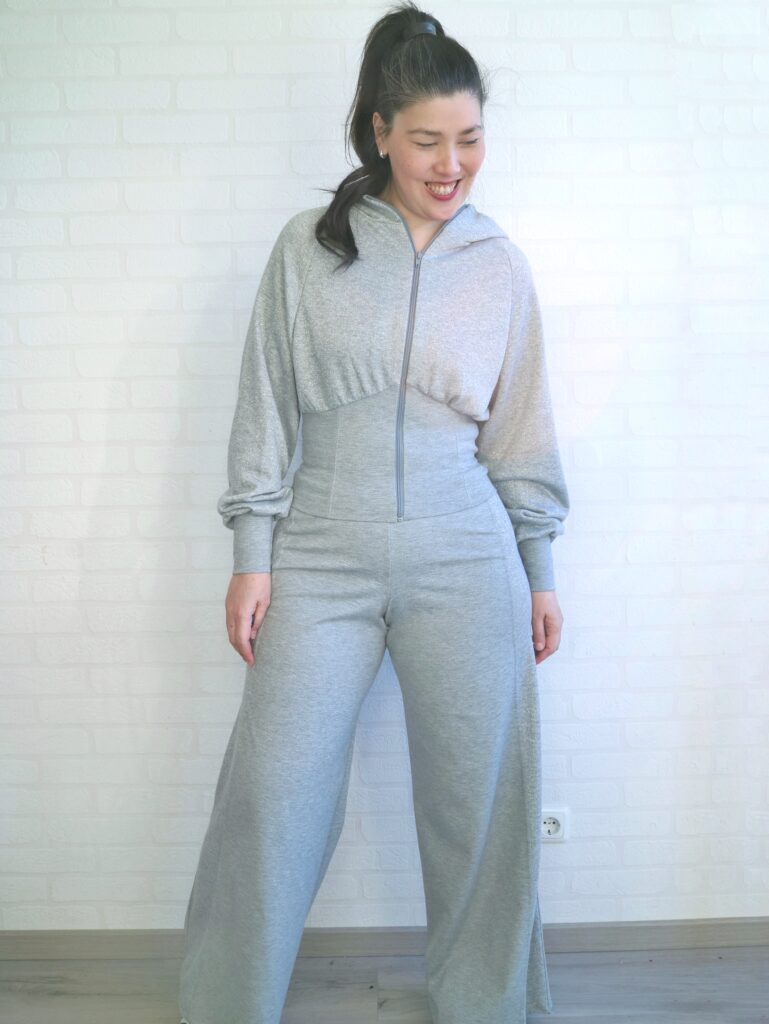
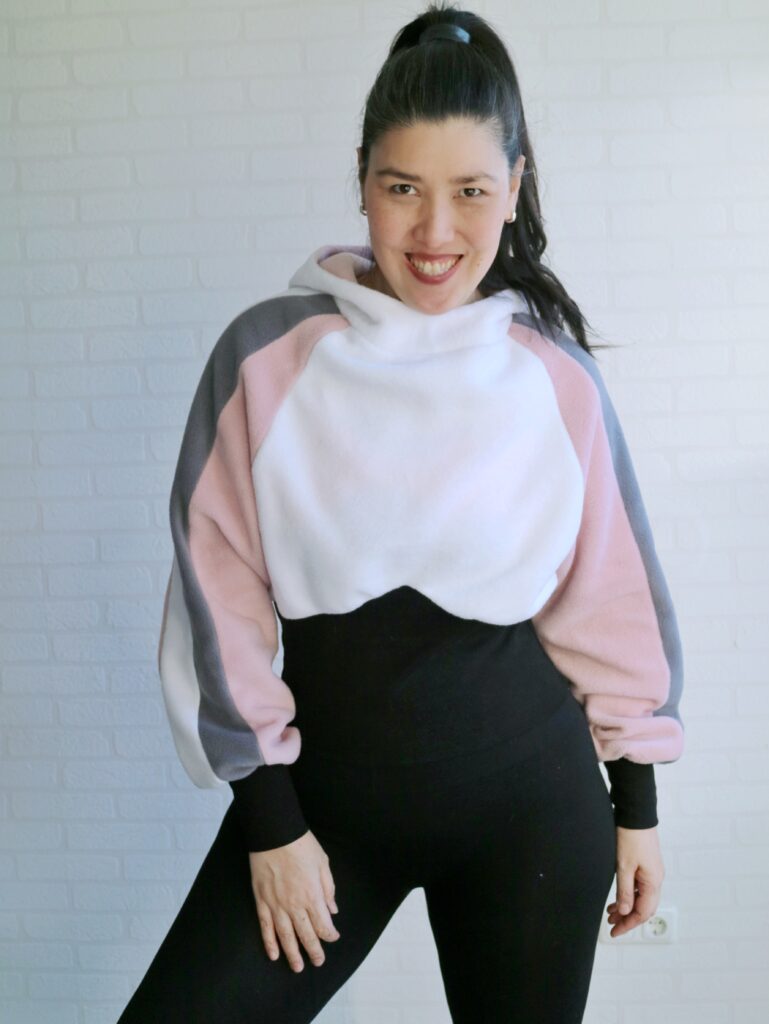
This second set is made with fleece and rib-knit only.
It’s so soft and warm!
I threw it over a pair of leggings and a long-sleeved shirt and went out for a walk in the snow with the kids and was completely comfortable.
In general I like the pants in ponte better just because if has less volume and is more flattering on my body, but if we’re talking about warmth and comfort, the fleece one wins hands down!
I decided to leave the pockets out for this set because of the extra volume along the side seams. I somehow forgot to photograph the waistband of the pants, but I used rib knit.
Moving on to the next set…
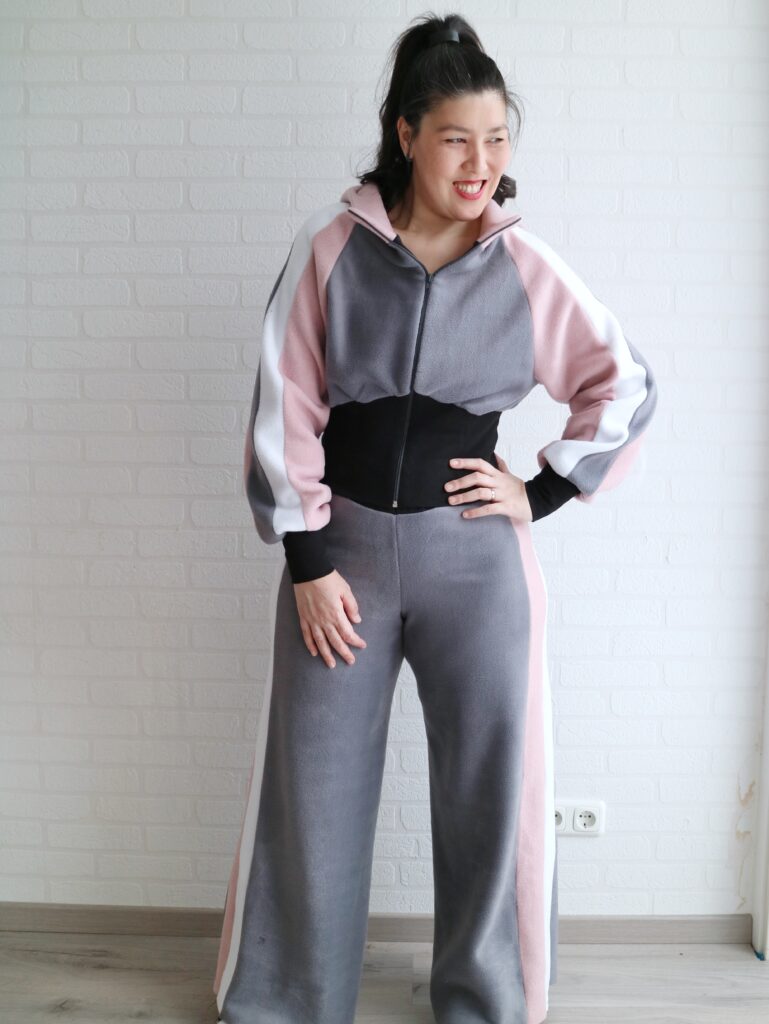
This one is french terry and ponte.
Jacket bodice, sleeves and hood are FT and pants, jacket waistband and cuffs are ponte.
You can see how a lighterweight fabric will alter the look of the jacket. This one is drapier and softer looking.
I love it both ways and for daily use, this one is probably more practical, but I must say that the puffy, dramatic, fleece one pulls more on my heartstrings haha
If you’re a beginner you may feel a bit intimidated by the zipper, but trust me, there’s no reason to! The instructions included in the pattern are fantastic, with step-by-step illustrations.
BUT
If you love the silhouette of the jacket and want to avoid sewing a zipper at all costs, let me show you my sweater hack! <3
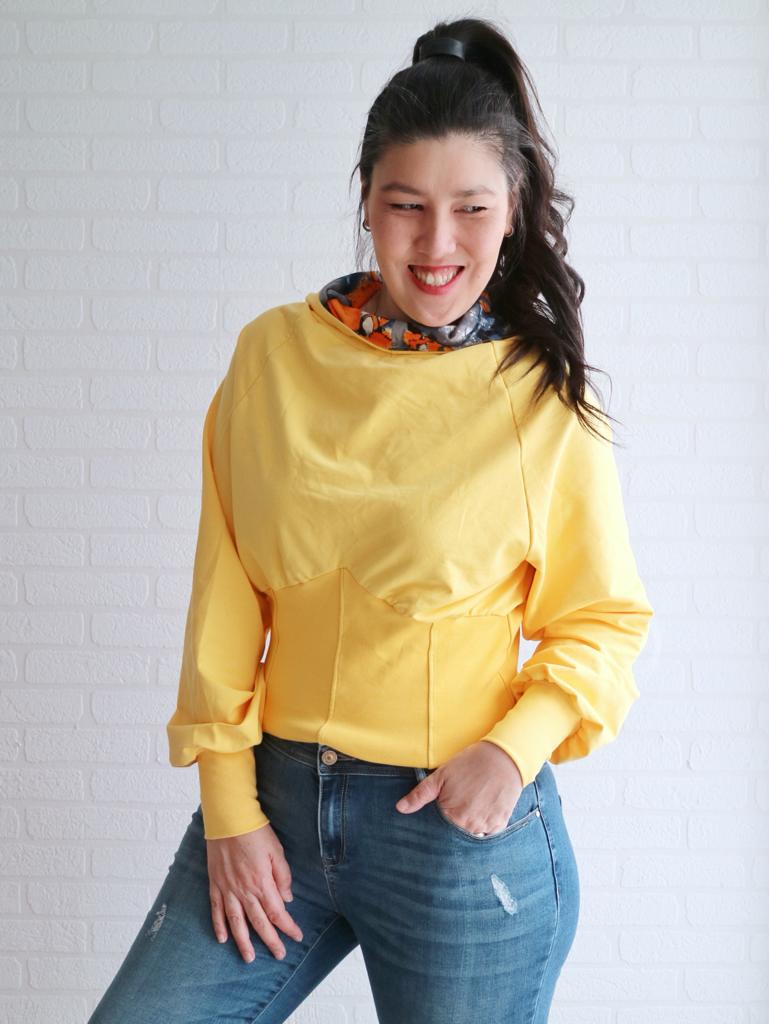
How FUN is this? I’m so happy with how these turned out!!
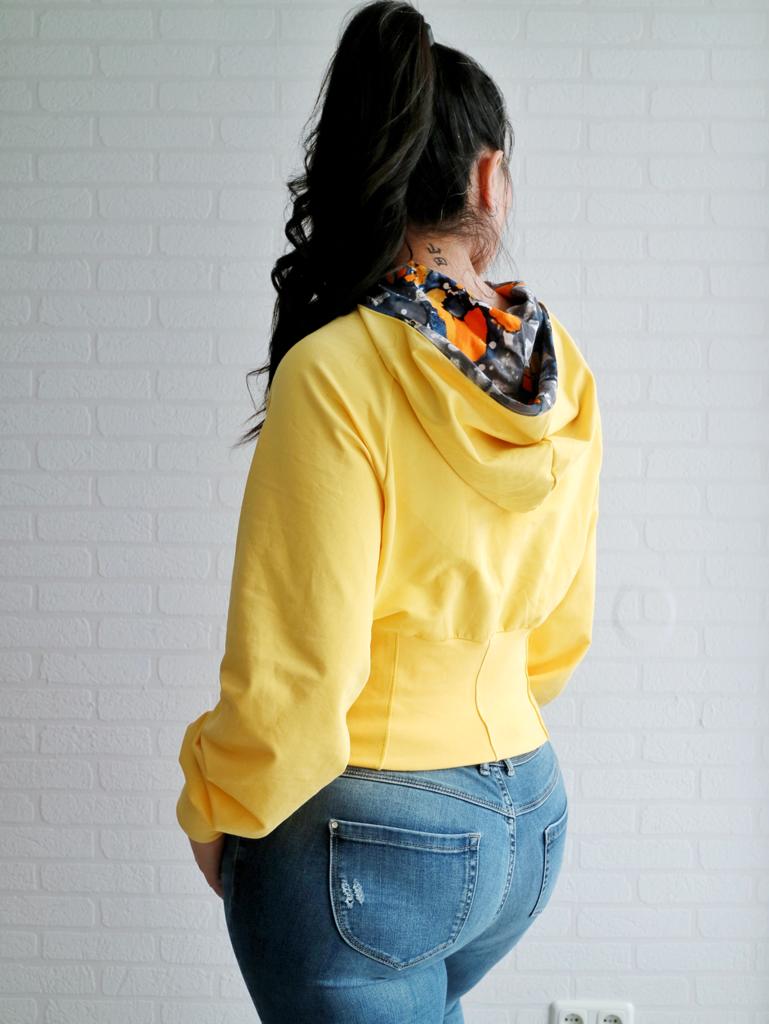
The first one I made was the yellow one.
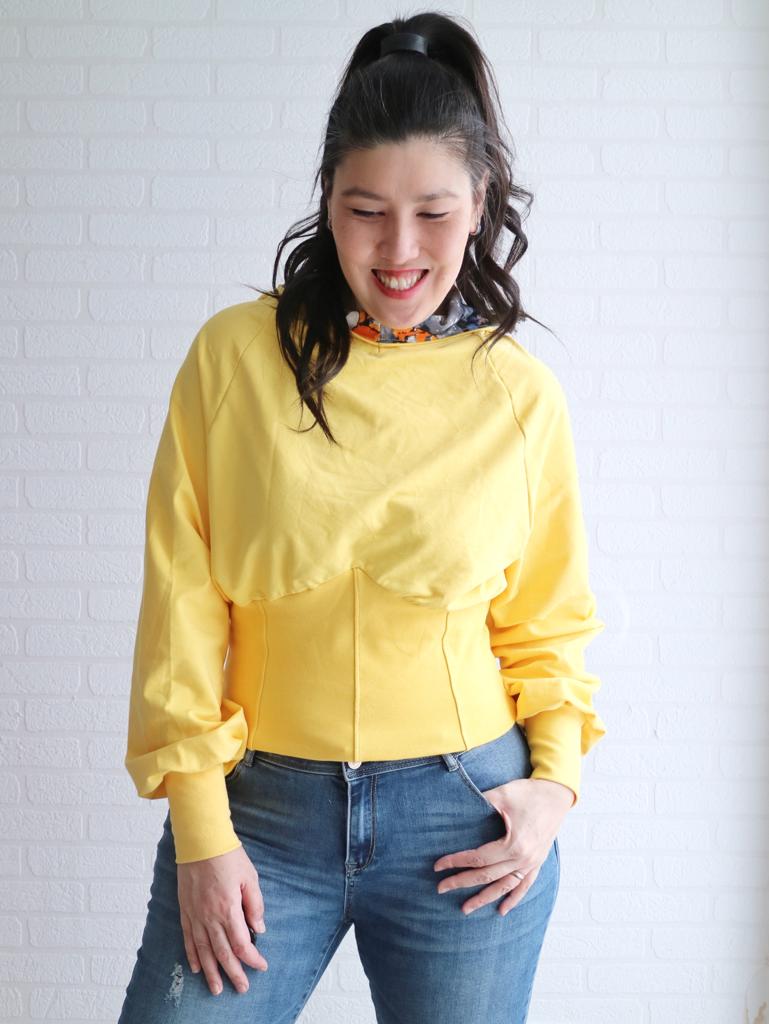
I used a lightweight french terry for the bodice, sleeves, and hood main. The hood lining is jersey and the waistband and cuffs are rib-knit.
For this one I didn’t change anything on the pattern, except to eliminate the seam allowances where needed and cut the front bodice and hood pieces on the fold.
For the rest I sewed it as per pattern and attatched the waistband center front as I would a V-neck.
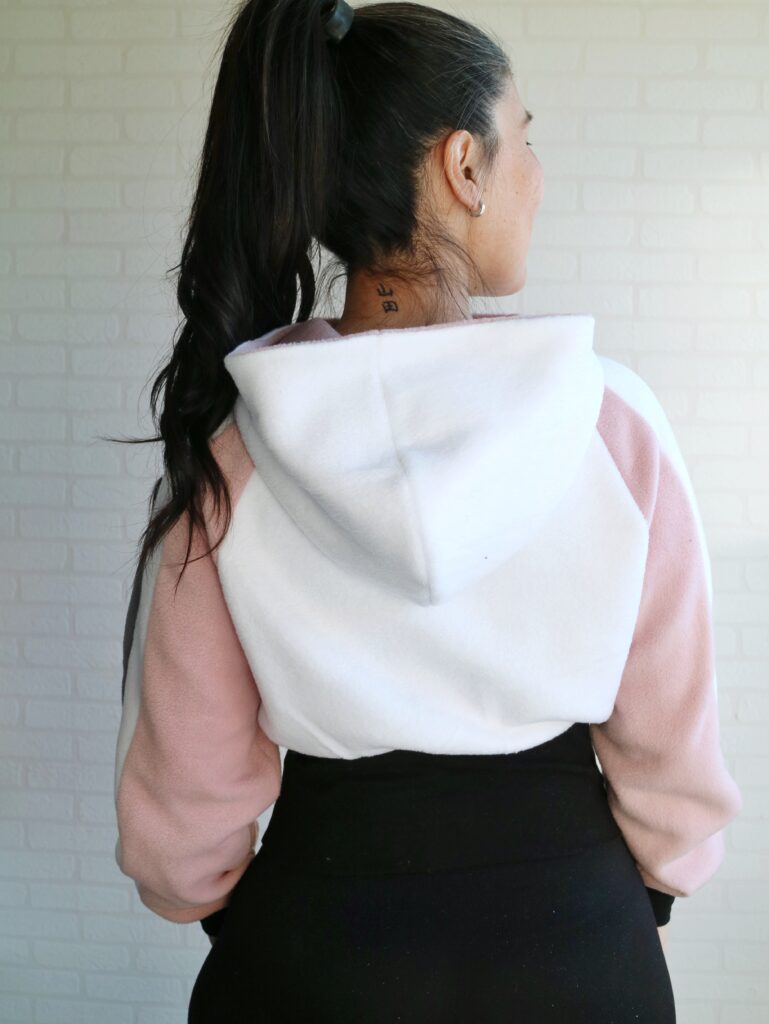
My next one I wanted our of fleece because, warmth and drama. lol
The front of the hood on this pattern is pretty high and without option to open the zipper at the neck it can be a bit ‘overwhelming’ on a regular use basis.
With the yellow one I just fold it down for a cute accent, but I figured that with a double layer of fleece that wouldn’t be cute nor comfortable. My solution was to shorten the height of the front of the hood by 1.5″.
Perfect!
Another thing I wanted to try was to make the waistband one piece.
I overlapped the pattern pieces on the seam allowance and cut both front and back on the fold.
It worked great! But keep in mind that my rib-knit is pretty stable and handled it well. If you use a weaker fabric, you may want to keep the seams to add stability to the band.
Ok!
This is it from me today…
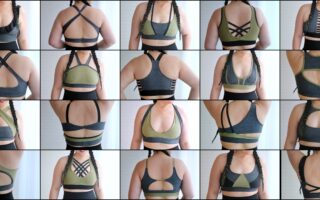
See you tomorrow (hopefully) to talk about the Switch it Up bras. 😉
If you want to grab the pattern(s), here are the links:
TRYOUT TRACKSUIT
BRA BUNDLE
SWITCH IT UP FRONT EDITION
SWITCH IT UP BACK EDITION
TEAM G+G Complete Collection
xxx
Livia
*this post contains affiliate links